Clipping has gone from being an accidental byproduct of pushing levels too hard to one of the most deliberate and widely used tools in modern mixing and mastering. The basic concept is straightforward: you drive a signal into a threshold and flatten the peaks rather than letting them pass through, which increases the apparent loudness while simultaneously adding harmonic content depending on how aggressively and which way you apply the clipping.
The difference between a great clipper and a mediocre one often comes down to how much control you have over the shape of that process, how well it handles aliasing at high drive levels, and whether you can apply it selectively without affecting parts of the spectrum you’d rather leave alone. Yum Audio Crispy Clip was designed to tick all three of those boxes in a single plugin.
When you’re comparing this to other popular options in the clipper category, the conversation usually starts with tools like Kazrog KClip 3, Voxengo OVC-128, Boz Digital Labs’ Big Clipper 2, and IK Multimedia’s T-RackS Classic Clipper.
Each of these has its own character and strengths, but where most single-mode or dual-mode clippers keep the frequency processing global and uniform, Crispy Clip’s Crossover Control brings something genuinely different to that conversation by letting you apply clipping selectively to specific frequency ranges rather than across the full spectrum simultaneously.
In my opinion, Crispy Clip is worth its price for producers and mixing engineers who regularly use clipping as part of their loudness and punch workflow and want a more precise and musically flexible approach than most clippers offer. The combination of up to 16x oversampling, the continuous Shape control blending soft and hard modes, and the frequency-selective crossover makes this one of the more thoughtfully designed clippers currently available. The 78 presets from industry professionals give you a genuinely useful starting point library that covers a wide range of applications.
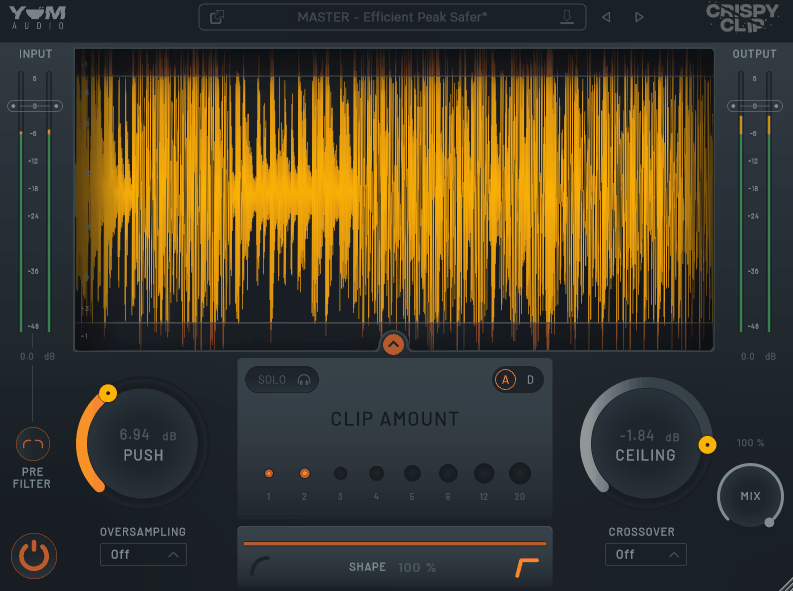
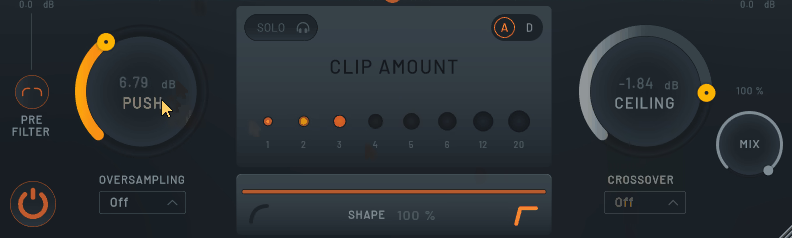
Push, Ceiling, and Shape
The core controls are intuitive once you understand what each one is doing in relation to the others, and I think spending a few minutes with each one individually before combining them is the right way to get started. The Ceiling parameter sets the clipping threshold, ranging from 0 to -48 dB, so you’re deciding at what level the waveform starts getting flattened.
The Push parameter then drives the input signal into that ceiling, ranging from 0 to 48 dB gain, which is where the actual character and intensity of the clipping comes from. The more push you apply relative to the ceiling, the more of the signal you’re hitting that threshold and the more pronounced the effect becomes.
What makes the plugin interesting beyond that standard push-ceiling setup is the Shape control, which provides a continuous blend from 0% to 100% between pure soft clipping and pure hard clipping. Soft clipping gradually curves the waveform as it approaches the threshold, rounding the peaks in a way that adds warmth and analog-like saturation without a harsh edge.
Hard clipping cuts the waveform abruptly at the threshold, which adds more aggressive harmonic content and the kind of gritty edge you hear on contemporary pop and hip-hop productions where controlled loudness is the goal.
Being able to sit anywhere along that continuum rather than choosing one or the other gives you tonal flexibility that most dedicated clippers don’t offer in a single control.
I love how naturally this translates into practical decisions while mixing. A subtle soft clip on a vocal bus adds presence and glue without the listener necessarily perceiving it as distortion. Moving that Shape control toward the harder end on a drum bus introduces transient energy and punch that feels more physical. Finding the exact blend for a specific source becomes an intuitive creative decision rather than a fixed technical setting.
The Crossover Control
For me, this is the most genuinely distinctive feature in the plugin and the thing that separates it most clearly from simpler clippers in the same price range. The Crossover Control lets you split the signal and apply clipping selectively to either the low or high frequency range, with the crossover frequency point being adjustable to wherever makes sense for the material you’re working on.
The practical applications for this kind of selective clipping are significant:
- Drum buses: you can apply more aggressive hard clipping to the mid and upper frequencies where the snap and attack live while leaving the low-end more intact so the kick retains weight and definition
- Mix bus: preserving sub and low-end punch while adding controlled loudness to the mids and highs without the low end getting artificially compressed by the clipping
- Bass instruments: applying soft clipping to the high end of a bass guitar or synth bass to add harmonic presence in the upper registers without dulling the fundamental
- Vocals: targeting specific frequency ranges where harshness tends to build without affecting the body of the vocal
- Parallel clipping setups: using the crossover to shape which part of the spectrum the wet signal affects before blending it back with the dry signal via the Mix control
The Pre Filter is also worth mentioning here, since it gives you a high-pass or low-pass filter on the input signal before it hits the clipper, which is useful for keeping the clipping algorithm from chasing unwanted frequency content and for reducing artifacts when you’re applying heavy processing. I found this especially useful on buses with significant low-end content where the clipping can otherwise get smeared by subsonic material the algorithm doesn’t need to process.
Oversampling and Visual Feedback
The oversampling options of 2x, 4x, 8x, and 16x address one of the most common problems with clipper plugins at high drive levels: aliasing. When a clipper flattens the top of a waveform at normal sample rates, the truncation introduces high-frequency artifacts that can add unpleasant digital harshness to the processed signal, particularly on complex or dynamic material.
Running the clipping process at 2x, 4x, 8x, or 16x the host sample rate and then downsampling back to your session rate dramatically reduces this, with 16x being the most artifact-free option at the cost of the highest CPU load.
I’d suggest starting at 4x for most mixing applications and moving to 8x or 16x if you’re doing mastering work or processing at very high drive levels where aliasing becomes audible. The difference between 2x and 16x is genuinely significant on heavy processing, so it’s worth spending time with the oversampling setting rather than leaving it at the default.
The real-time waveform visualizer shows you the impact of the clipping in visual form, displaying not just the processed output but also the difference signal between processed and unprocessed so you can see exactly what the clipper is removing or reshaping.
This makes the A/B comparison much more informative than simply toggling the bypass switch, and I found it helpful particularly when dialing in subtle settings where the ear alone might not catch whether the processing is actually doing anything meaningful. 78 included presets from professional sound designers and engineers give you a comprehensive library covering drums, mix bus, mastering, vocals, synths, and more, and I realized that even when I wasn’t using them directly they were useful as reference points for understanding how far to push the controls in specific contexts.
Formats: AU, VST3, AAX
Works with: macOS and Windows
Price: $79 (free Crispy Clip Light version also available)
Check here: Yum Audio Crispy Clip
Hello, I’m Viliam, I started this audio plugin focused blog to keep you updated on the latest trends, news and everything plugin related. I’ll put the most emphasis on the topics covering best VST, AU and AAX plugins. If you find some great plugin suggestions for us to include on our site, feel free to let me know, so I can take a look!