

Most vocal chain guides hand you a list of plugins and leave you to work out the order for yourself. I think that is backwards, because with vocals the order does more work than the individual plugins do. You can own every famous compressor ever modelled and still end up with a thin, harsh vocal if the compressor is sitting in the wrong place.
So this list runs in the order the signal should actually travel: cleanup first, then pitch, then subtractive EQ, then resonance control, then compression, then character and space. Every plugin below sits at its correct point in the chain, and the entries explain not just what each one does but why it belongs exactly where it is.
One thing before we start. Every stage here is optional. A great vocal recorded in a treated room might need two of these. A phone-recorded demo might need eight. Work down the chain and skip anything the recording does not actually need, because every processor you add is another chance to make it worse.
1. Waves Clarity Vx
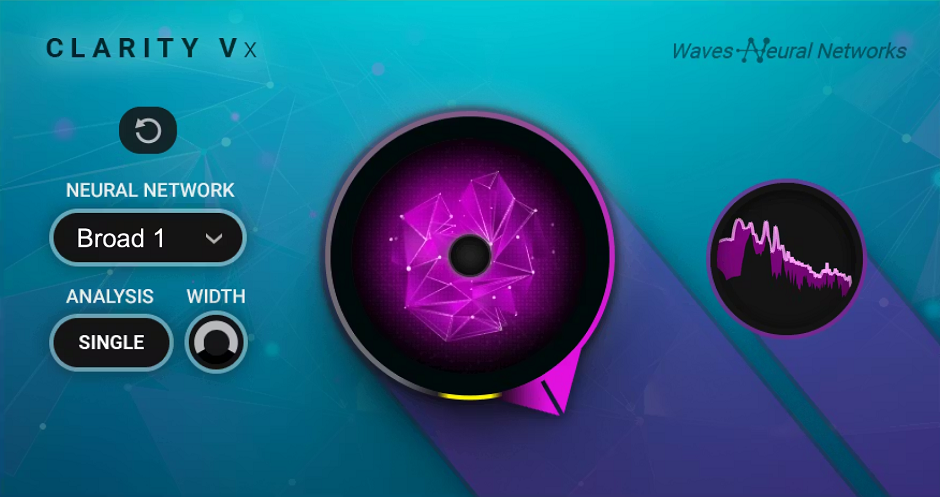
Nothing else in a vocal chain works properly until the noise is gone, which is why Waves Clarity Vx opens this list. Compression makes noise louder. Saturation makes it uglier. EQ boosts it along with everything else. Whatever is wrong with the raw recording gets amplified by every single thing you do afterwards.
Clarity Vx approaches noise removal differently from a traditional gate. Instead of a threshold that decides what counts as noise, it runs the signal through a neural network trained specifically to recognise human voice and separate it from everything that is not. In practice that means it handles the cases that defeat threshold-based tools: background conversation, hum sitting inside the vocal range, noise that starts and stops mid-phrase. That same quality is why it has become a fixture in spoken-word work, and why it earned a place in my roundup of the best plugins for podcast and voiceover.
- One-Knob Design:
The main interface is a single large knob controlling how much of the separated noise gets removed, with an A/B processing engine under the hood. Pull it back and room ambience blends naturally back in, which matters because completely sterile vocals rarely sit well in a real mix. Push it fully and the voice stands alone.
For dialogue work or genuinely difficult recordings there is a Pro version with frequency-specific processing across multiple bands, but for music vocals the standard edition covers the job. Most engineers I know who own both still reach for the simple one on singing.
2. RysUpNoise
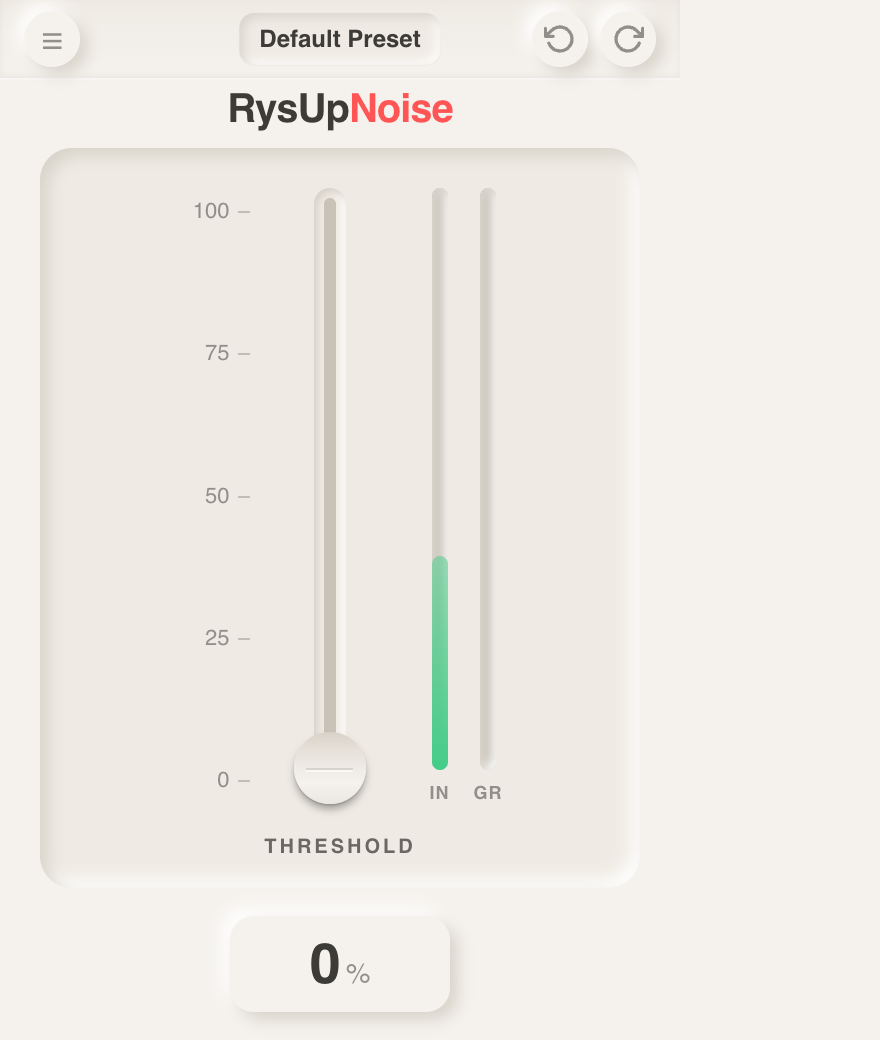
RysUpNoise takes the opposite philosophy to the neural approach: one threshold fader, an input meter, a gain reduction meter, and nothing else. You push the fader up until the room disappears between phrases and stop when the vocal itself starts to suffer. There is no learning curve because there is deliberately nothing to learn.
The honest truth about home recordings is that most of them do not fail because of the microphone. They fail because of the room behind it: the computer fan, the air conditioning, the street outside. Treating the room itself pays off more than any plugin, and I covered that side of the problem in my guide to acoustic panels for home recording. But when the recording already exists and you cannot go back, a transparent gate running first in the chain is the cheapest rescue there is.
Threshold-based reduction is also lighter on CPU than neural separation, and for steady room tone it is completely sufficient. The neural approach earns its money when the noise is unpredictable. Owning one of each covers everything, and at $49.99 this half of the pairing costs very little.
- Real-Time Tracking Use:
Because it runs live rather than as offline processing, you can leave it on the input and record through it. The side-by-side input and reduction meters show exactly how much is being pulled out at any moment, so overdoing it is hard.
3. Brainworx bx_crispytuner

Pitch correction belongs early in the chain, before compression and saturation, because pitch detection works best on a clean signal with its natural dynamics intact. bx_crispytuner is the tool for when you want to go past correcting and start editing, and it holds its own against tuners costing several times more, something I dug into properly in my comparison of the best AutoTune and pitch correction plugins.
- Two Correction Modes:
Real-time mode handles automatic correction while tracking or mixing, with scale and key targeting. Graphical mode lets you draw pitch curves by hand, note by note, for the lines that need a specific melodic decision rather than an automatic one. That combination used to be the exclusive territory of much more expensive software.
- Crispy Mode:
The built-in trick that earns the name: Crispy Mode generates a doubled, hard-tuned layer that sits underneath the main vocal. It is a production effect rather than a corrective one, and it is exactly the sort of thing you reach for when a hook needs more than it currently has.
- Latency Behaviour:
The real-time engine runs light enough to track through, and the graphical editor works on captured audio without forcing a bounce first. For singers who want to hear themselves corrected in the headphone mix, that low-latency path matters more than any other spec on the page.
4. RysUpTune

RysUpTune covers the classic real-time tuning territory with sub-10ms latency, a target-pitch keyboard, scale snapping, and formant and shift control. The animation above is the whole workflow: pick the notes the vocal is allowed to land on, then set how fast it snaps to them.
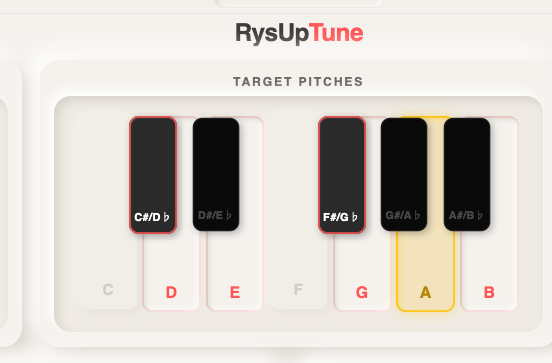
The keyboard is the part that decides whether the correction sounds musical. Tap in only the notes that belong to the song and the vocal can only ever land on those, which is how you stop the tuner chasing passing notes it should have left alone.
- Transition Speed:

This is the one control that matters most, because it is the difference between the two completely different jobs pitch correction does. Set it slow, around 40ms, and the correction turns invisible: the singer still slides between notes the way a human does, they just arrive in the right place. Set it near zero and the pitch snaps instantly between targets, which is the hard-tuned effect that has defined pop and hip-hop hooks for twenty years.
Most people set this far too fast when they want natural correction, which is why so many amateur mixes have that faintly robotic quality nobody intended. If you want the correction to disappear, slow it down more than feels right.
5. Waves Harmony
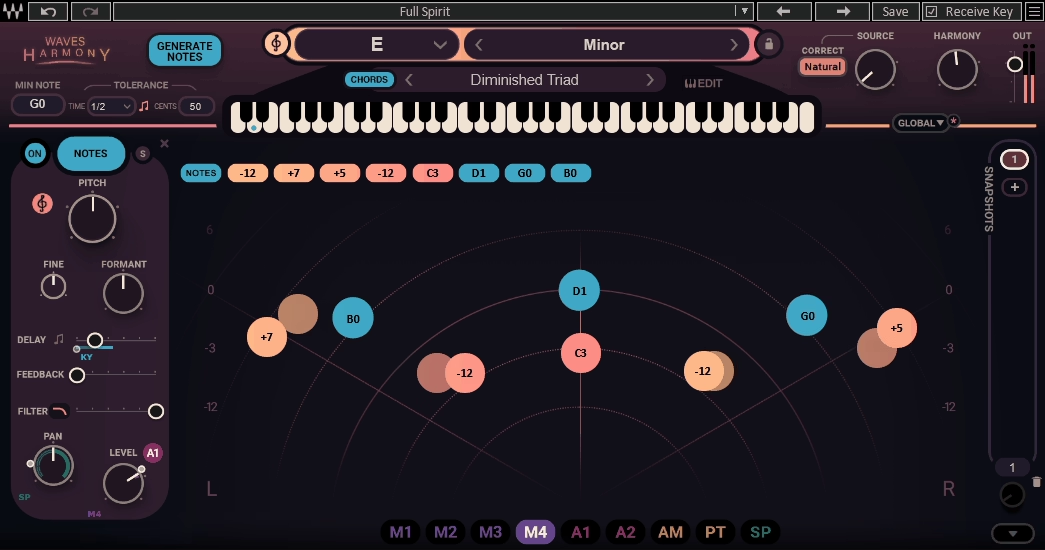
Strictly speaking Waves Harmony is not a corrective tool at all, but it lives at this point in the chain for the same technical reason as the tuners: it needs clean, uncompressed input to track pitch accurately.
It generates up to eight harmony voices from a single lead, each with independent control over pitch, formant, timing and pan, driven either by a fixed scale or live MIDI so you can literally play the harmonies from a keyboard while the vocal runs. And if you need stacked vocal content without a singer at all, that is a different tool for a different day, which I covered in my guide to the best vocal Kontakt libraries.
- Humanisation Controls:
Generated harmonies tend to sound synthetic precisely because they are too perfect. The humanisation section offsets timing and pitch slightly per voice, which is what stops a stacked chorus sounding like a machine. If you use this plugin, spend your time there rather than on the note selection, because that is where the realism lives.
- Formant Shaping:
Each voice can have its formant shifted independently of pitch, which lets a single singer credibly cover parts that sound like different people. Push a low harmony’s formant down and it reads as a bigger, darker voice rather than the same singer pitched down.
6. Three-Body Technology Kirchhoff-EQ
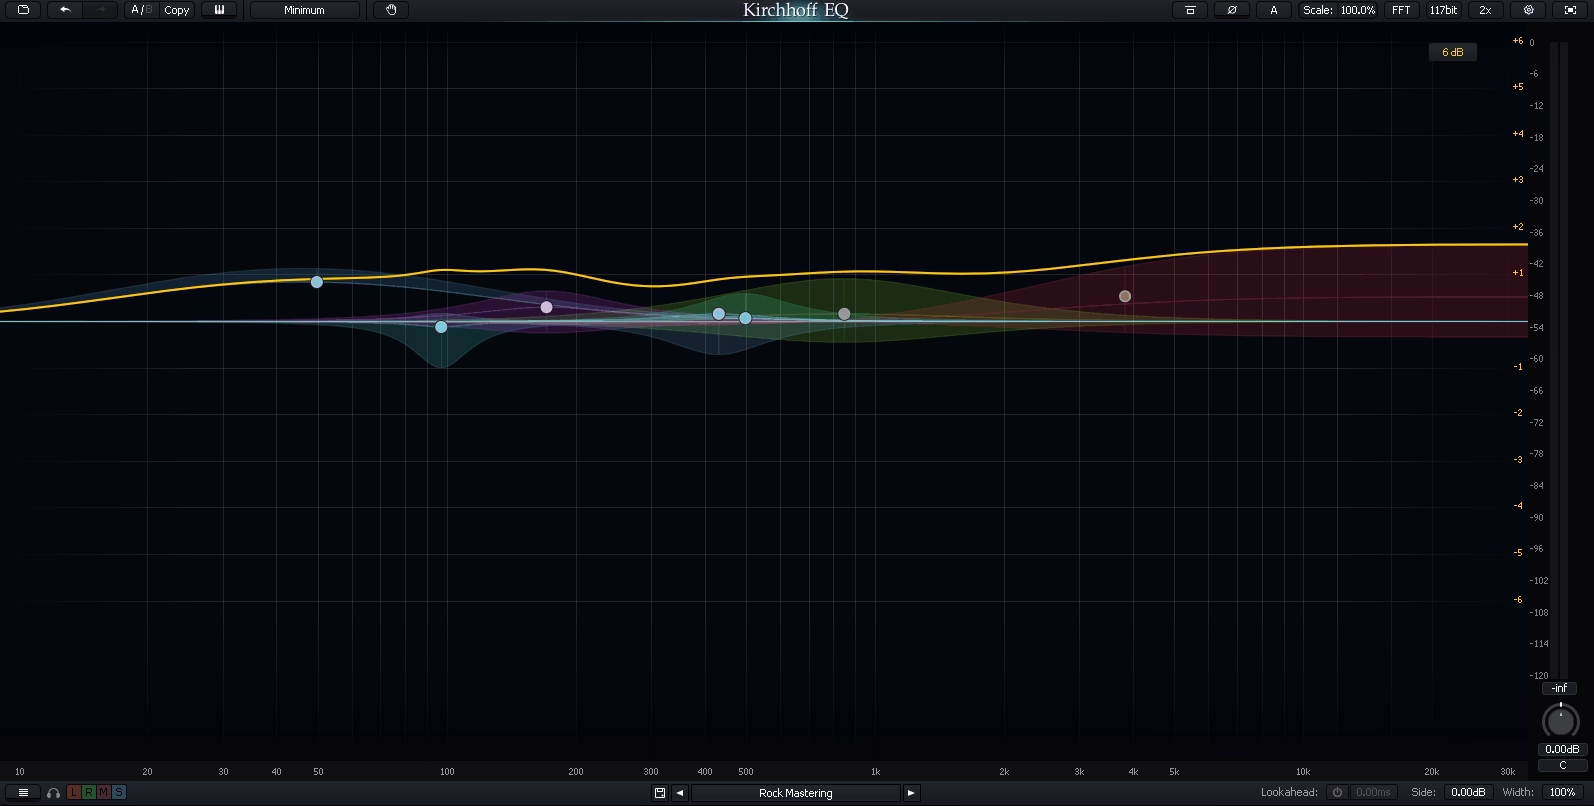
Now the subtractive EQ stage, and its job is entirely removal: low-end rumble, the boxiness around 300 to 500Hz, the resonant note the room left behind. Do it before compression, because a compressor reacts to whatever you feed it, and a lump of low-mid energy will make it duck the entire vocal every time that lump appears.
Kirchhoff-EQ is the one I would point at if you want a single EQ that covers everything from surgical cleanup to analogue-flavoured tone shaping. It has quietly become the EQ professionals mention whenever the premium names come up, a conversation I had myself in my look at FabFilter, iZotope, LANDR and Valhalla.
- 32 Bands and Analogue Curves:
It carries 32 bands and a large collection of modelled analogue filter types drawn from classic hardware, so the same plugin does transparent notches and musical, vintage-flavoured shelves without switching tools.
- Dynamic Behaviour Per Band:
Any band can be made level-dependent, engaging only when its frequency crosses a threshold. That quietly makes Kirchhoff a de-esser and a multiband problem-solver as well as a static EQ, which is a large part of why one instance often replaces three plugins.
- High-Precision Processing:
The internal engine runs at high bit-depth with minimal phase distortion even under heavy cutting, which is exactly what you want when stacking several corrective moves on one vocal. It is a heavier tool than most vocal work strictly requires, but if you want one EQ for vocals, buses and mastering, this is the serious candidate.
7. RysUpEQ

RysUpEQ runs the modern EQ workflow everyone now expects, at a fraction of what the workflow used to cost: click the curve to create a band, drag to shape it, watch a live spectrum analyser respond behind the curve while you work.
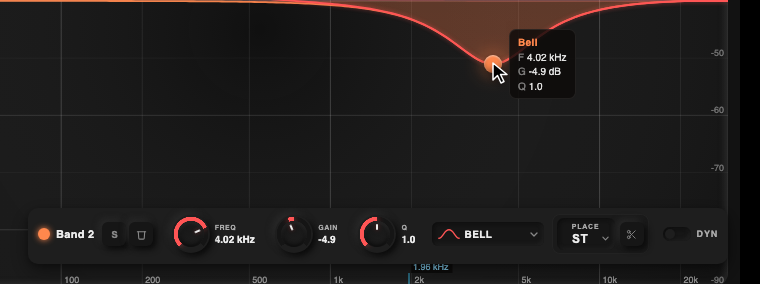
Every band reports its exact frequency, gain and Q while you drag, and the feature set goes well past the basics: spectrum matching, sketch-a-curve, dynamic per-band behaviour, A/B slots and a zero-latency mode for tracking.
- The Boost-and-Sweep:
The technique that matters most at this stage, spelled out in case you have never done it deliberately: create a band, boost it hard by 10 or 12dB, narrow the Q, then sweep slowly across the low-mids. The point where the vocal sounds worst is your problem frequency. Flip the boost into a 2 to 3dB cut and move on. That single move fixes more muddy vocals than any other EQ decision.
- Zero-Latency Mode:
Corrective EQ often needs to happen while tracking, and the dedicated zero-latency mode means singers can monitor through it without the smearing delay that linear-phase processing introduces. Flip back to the standard engine when mixing.
8. Waves F6 Floating-Band Dynamic EQ
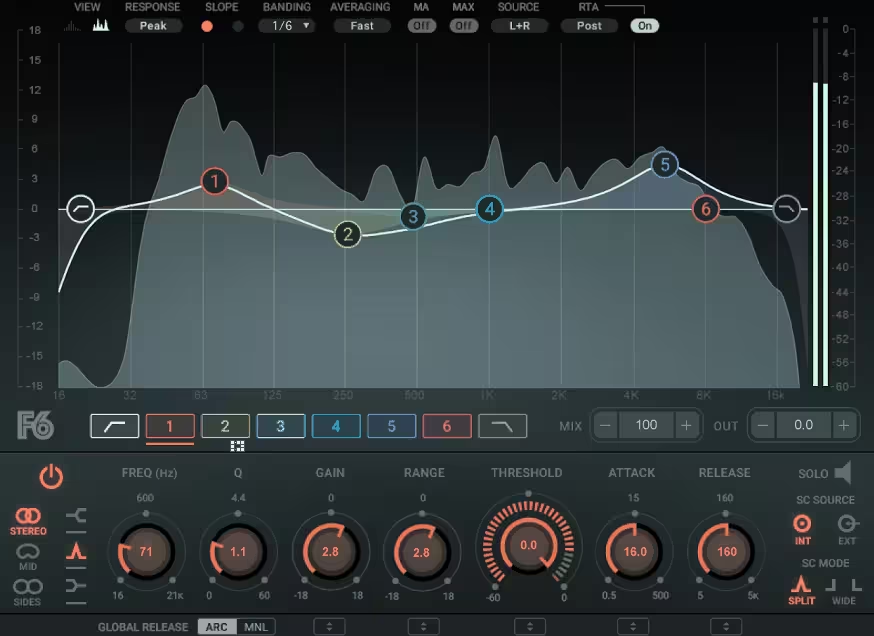
Waves F6 bridges the gap between static EQ and full resonance suppression. Six floating bands, each with its own threshold, attack and release, so a cut only engages when that frequency actually crosses the level you set and leaves the vocal alone the rest of the time.
That conditional behaviour is what makes dynamic EQ the honest fix for problems that come and go. A static cut at 3kHz dulls every word to fix the three words that were harsh. An F6 band at the same frequency fixes those three words and touches nothing else.
- The De-Esser Trick:
Park a band across the sibilance range, roughly 5 to 8kHz, set the threshold so it only catches the sharp consonants, and F6 becomes a better de-esser than most dedicated de-essers, because you control exactly how wide and how deep the correction goes. Do this after compression, since compression pushes sibilance forward.
- Mid-Side Per Band:
Every band can process mid and side independently, which earns its keep on stacked and widened vocals: de-ess the centre lead without dulling the airy sides, or clean harshness from the doubles without touching the lead.
9. RysUpSmooth
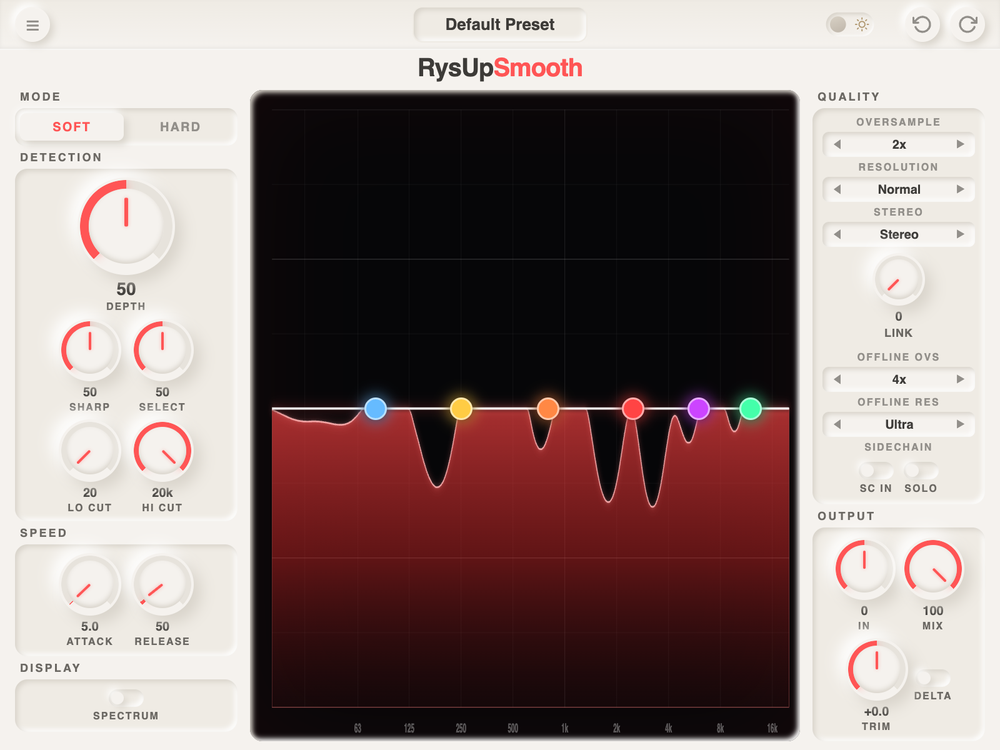
This is the stage most home producers skip entirely, and it is the one that separates vocals that sound expensive from vocals that sound almost right. Voices produce narrow resonant peaks that move as the singer changes pitch and vowel: the harshness is at 3kHz on one word and 4.5kHz on the next, so no static cut can follow it.
RysUpSmooth hunts those peaks continuously and pulls them down only while they are actually happening. The red curve in the display shows exactly what is being removed in real time, with per-band markers, soft and hard modes, sharpness and selectivity controls, adjustable detection range and oversampling.
It sits before compression for a mechanical reason: harsh resonant peaks trigger compressors hard, so removing them first stops the compressor overreacting to frequencies you were going to take out anyway. This category used to cost more than most bedroom producers would ever spend, which is exactly why so few of them ever heard what it does. At $49.99 that excuse is gone.
- Delta Monitoring:
The most useful habit in this entire article: press the delta button and you hear only what the plugin is removing. It should sound like harshness and ringing, nothing else. If you can clearly make out words and melody in the delta signal, you have gone too far and are eating the vocal along with the problem. Back off until the delta turns unintelligible, then listen normally again.
10. Shadow Hills OptoMax
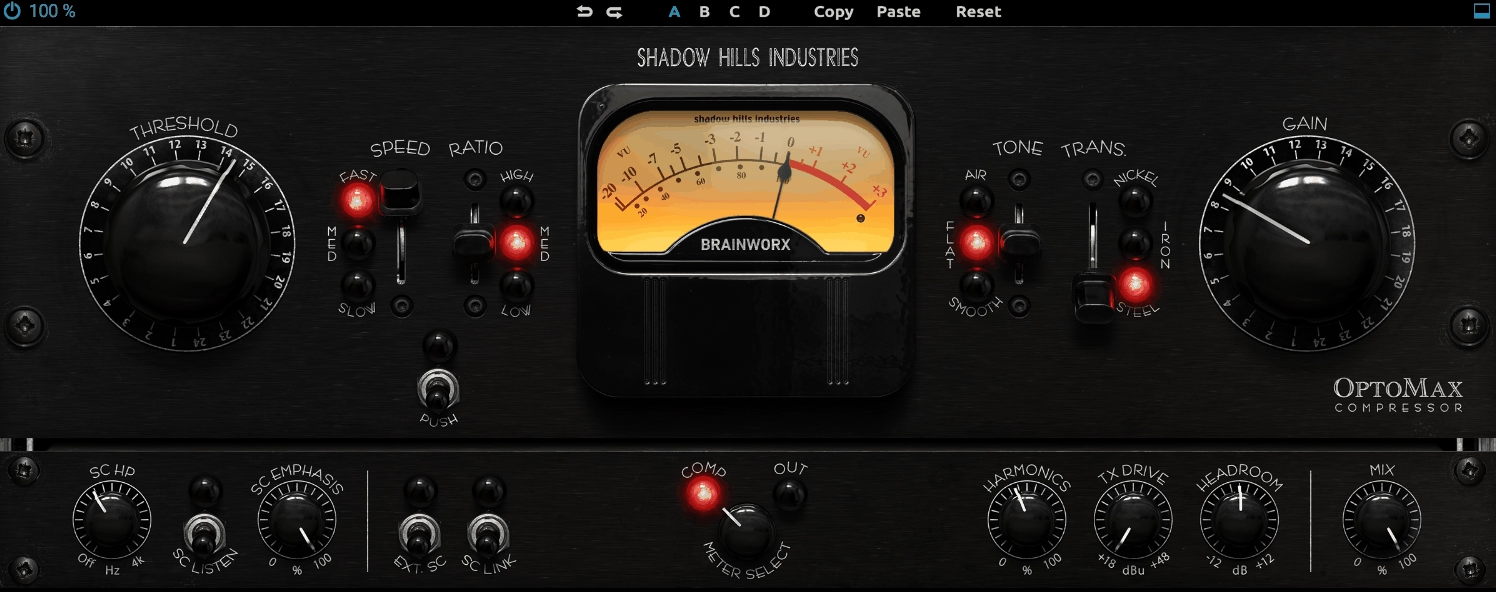
Now compression, and the single most useful thing I can tell you about compressing vocals is that two gentle stages almost always beat one aggressive one. Four or five decibels of reduction from one compressor, then three or four more from a second with a different character, sounds dramatically more natural than ten decibels from a single unit.
Shadow Hills OptoMax is a beautiful first stage. It takes the optical section from the legendary Shadow Hills Mastering Compressor and expands it into a dedicated processor, with the slow, programme-dependent response that makes optical designs sound less like something being done to the vocal and more like the vocal simply behaving better.
- Four Optical Flavours:
Rather than one fixed cell, OptoMax offers multiple optical attenuator models with genuinely different personalities, from gentle levelling to a thicker vintage pull. On a lead vocal the slower cells produce that smooth, expensive evenness that made the hardware famous.
- Sidechain Filtering:
A high-pass filter in the detector stops the low end from pumping the whole vocal, which is precisely the failure mode of cheap optical emulations. Set it around 100 to 150Hz on a vocal and the compression follows the words rather than the plosives.
11. RysUpComp

RysUpComp packs four compression models into one plugin: a clean modern VCA alongside three optical and FET-style characters modelled on studio classics. That combination is what makes the two-stage approach cheap to run, because one instance in FET mode catches peaks fast while a second in optical mode smooths the body, without buying two plugins.
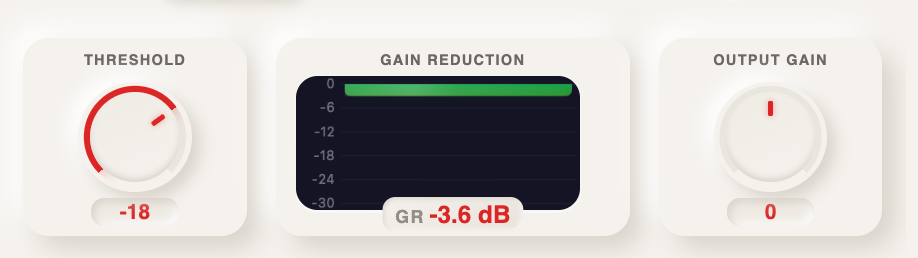
The row above does most of the work in vocal compression: threshold, a live gain reduction meter front and centre, output gain to make back what you took. Because all four characters live behind one set of controls, you can audition the FET against the optical on identical settings in seconds, which teaches the difference between compressor types faster than any article about them, including this one.
- The Mix Control:
Blending uncompressed signal back in gives you parallel compression inside a single instance, keeping the transients and natural dynamics of the original performance while the compressed copy glues the level together underneath. On vocals, start around 70 to 80 percent wet and back off from there.
12. Three-Body Technology Cenozoix Compressor
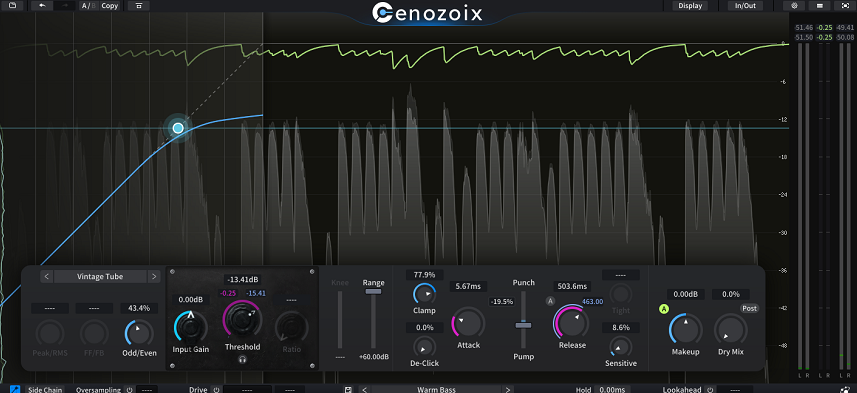
Cenozoix is the deep-control option from the same team behind Kirchhoff, and it is the compressor I recommend to anyone who has learned the basics and now finds standard controls limiting.
It offers multiple compression topologies covering clean digital through modelled analogue behaviours, adjustable knee shape, extensive sidechain filtering, and a level of detail over the attack and release curves that most compressors simply do not expose. Its anti-distortion technology also keeps fast release settings clean where classic designs start to buzz.
- Who It Is Actually For:
It rewards understanding precisely what each parameter does, which also makes it a poor first compressor. Start with something simpler, learn what attack and release do to consonants and sustain, and come to Cenozoix when you know exactly what you want to change and your current tool will not let you change it.
13. Brainworx bx_2098 EQ
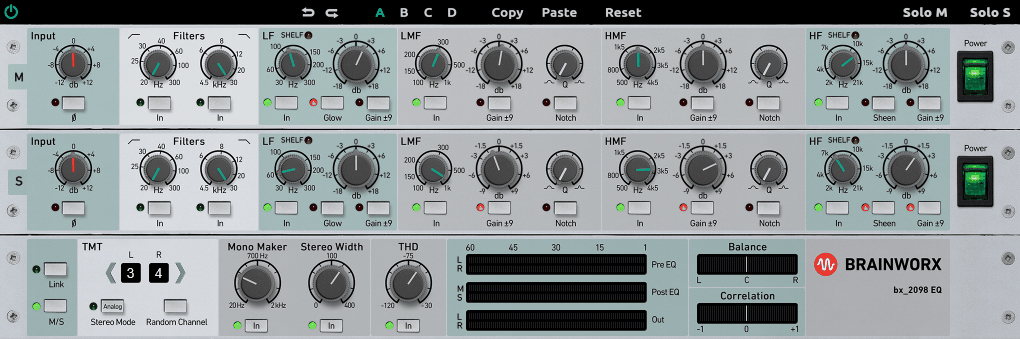
From here the chain turns creative: the corrective work is done and this is the second EQ moment, additive rather than subtractive, where you shape the vocal to sit the way you want it in the track.
bx_2098 EQ is built for exactly this. It is a channel EQ in the classic British 80-series tradition, and the reason you reach for it here instead of a surgical digital EQ is that its curves are musical by design: broad, flattering boosts that make a vocal sound produced rather than processed.
- TMT Channel Modelling:
Brainworx’s Tolerance Modeling Technology simulates the component-level variation between channels of a real console, so two instances of the plugin do not sound digitally identical. On stacked vocals, assigning different channels to lead and doubles produces the subtle width real desks gave for free.
- Where To Boost:
The classic vocal moves live here: a broad shelf up top from around 10 to 12kHz for air, a gentle push around 3kHz for presence if the mix is crowded, and, more often than people expect, a small low-mid boost near 200Hz to give a thin vocal some chest. Additive EQ works best in single decibels.
14. Brainworx bx_Enhancer
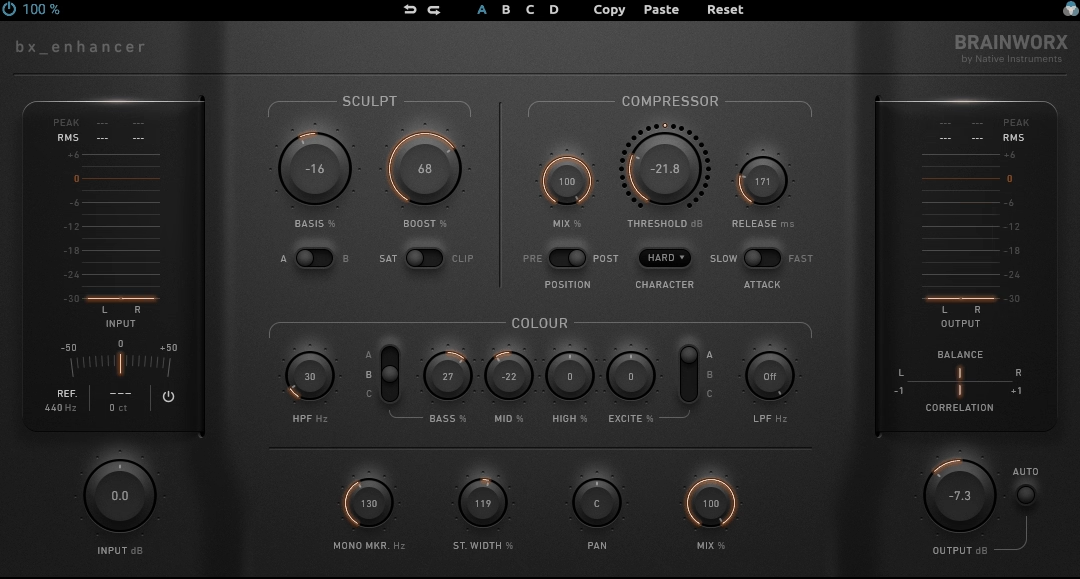
bx_Enhancer handles the presence job that EQ alone cannot: making a vocal feel closer and more forward without simply turning it up. Enhancement adds harmonic content, and those extra harmonics give the ear more to latch onto, so the vocal reads as louder and nearer at the same fader position.
That distinction matters in dense mixes. Boosting 3kHz with an EQ raises everything living at 3kHz, including the harshness you spent stage four removing. Generating fresh harmonics instead adds presence without re-inflating the problem.
Enhancement is a seasoning, and every step up feels exciting for the first thirty seconds. Set the amount, walk away, come back and A/B against bypass at matched volume. If bypassed suddenly sounds dull rather than the enhanced version sounding better, you are at the right amount. If the enhanced version sounds obviously effected, halve it.
- Separate Drive Paths:
The plugin splits its processing so you can push character into the upper mids while leaving the low end completely clean, which is exactly the shape a vocal wants: grit where presence lives, nothing added where mud lives.
15. Brainworx bx_pulsar
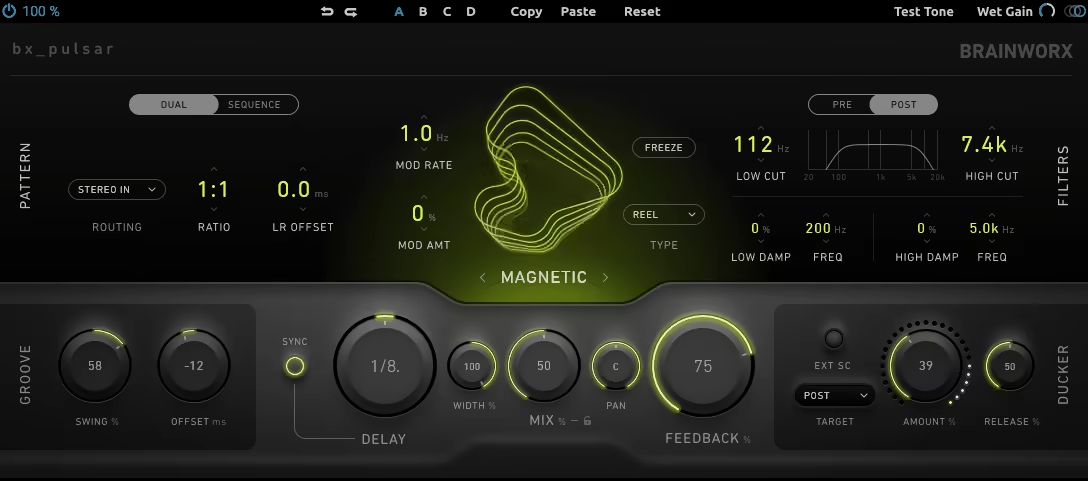
The chain ends with space, and bx_pulsar is the delay I would put on the vocal send. Delay has largely replaced reverb as the default vocal space in modern production because it creates depth without the wash that pushes a voice backwards in the mix.
Pulsar goes well past a basic echo: modulation and filtering inside the feedback path mean the repeats can darken, warp and degrade as they trail off, which keeps them out of the way of the next line instead of competing with it. Most modern vocal chains run a short plate alongside the delay rather than instead of it, and if you want to go deep on that half of the equation I covered the options in my guide to the best room, plate and chamber reverb plugins.
- Send, Not Insert:
Run it on a send so you blend the wet signal under the dry vocal rather than committing to it, and high-pass the return so the repeats do not re-introduce the low-mid mud you cleaned out in stage three. Timed quarter or eighth-note repeats that land in the gaps between phrases fill a production without crowding it.
The All-In-One Alternative
Everything above builds the chain from individual plugins, which gives you the most control and lets you swap any single stage. The alternative is a channel strip that carries most of these stages in one window.
Scheps Omni Channel was designed around exactly this problem: EQ, two compressors, a de-esser, gate and saturation in a single instance, with modules you can reorder by dragging. That drag-to-reorder detail makes it a genuinely good way to learn what chain order does, because you hear the difference immediately instead of rebuilding a plugin chain each time.
If you want console-style character rather than a modular strip, bx_console N models a classic large-format desk channel, complete with the per-channel component variation that gives real consoles their sound. And if the desk sound you are after is specifically that famous British bus glue, I ran through the whole family in my guide to the best SSL plugins.
The Chain, Assembled
Put together, the full order runs like this:
- Noise reduction to clean the recording
- Pitch correction while the dynamics are still intact
- Subtractive EQ to remove rumble, mud and resonant notes
- Resonance suppression to catch the moving harsh peaks
- Compression in two gentle stages rather than one hard one
- De-essing after compression, since compression brings sibilance forward
- Enhancement and additive EQ for presence, air and weight
- Delay and reverb on sends, never inserts
Two of those deserve a note. De-essing lands after compression because compression raises sibilance relative to everything else, so de-essing first treats a problem that is about to get worse. And resonance suppression sits before compression because harsh peaks trigger compressors hard; remove them first and the compressor responds to the performance instead of to frequencies you were going to cut anyway.
The Bottom Line
If you take one thing from this, make it the order rather than the shopping list. Clean, then tune, then cut, then control resonance, then compress, then colour. That sequence does more for a vocal than any individual plugin on this page.
On the money side, the five Rys Up plugins here are $49.99 each, with a complete suite covering the whole set, and two free plugins (RysUpAir and RysUpRack) that cost nothing to try. The established names run higher but spend much of the year on sale. The honest answer to whether the expensive one is better has become “sometimes, and less than it used to be,” so judge them on your own material rather than on the badge.
And remember that no chain fixes a poor source. If the raw recordings are the real problem, start with my guides to the best dynamic mics for recording vocals and the best USB microphones for home recording before buying a single processor. The best vocal chains I have heard are usually shorter than people expect: a bit of cleanup, one or two stages of compression, a touch of character and a send to a good space. Everything else is there for when the recording actually needs rescuing.

Hello, I’m Viliam, I started this audio plugin focused blog to keep you updated on the latest trends, news and everything plugin related. I’ll put the most emphasis on the topics covering best VST, AU and AAX plugins. If you find some great plugin suggestions for us to include on our site, feel free to let me know, so I can take a look!