A digital audio workstation is the main software you use to record, edit, and produce music on your computer. If you’re using Windows and want to start making music without spending money upfront, you have more options than you might think.
Today I’ll talk about the best free DAW software for Windows users available. Programs like BandLab Cakewalk, Tracktion Waveform Free, and LMMS offer fully-featured environments that let you record unlimited tracks, use professional plugins, and create finished songs without paying anything.
Some of these, like Cakewalk and Pro Tools Intro, started as paid programs that went free. Others, such as AKAI Pro MPC Beats and Endlesss Studio, are lite versions or companion tools from established brands.
A few like Ardour and Audacity were built from the ground up to stay free forever. Even UAD LUNA, known for its premium hardware integration, offers a free tier for Windows users.
Which one is actually “best” really comes down to the kind of music you make and how you like to work. Some free DAWs lean toward loop-driven beatmaking. Others feel more at home with live instruments and microphones. A handful do both surprisingly well. You’ll find beginner-friendly picks, and also a few that professionals actually use in real-world studio sessions.
1. AKAI Pro MPC Beats

Image Credit: AKAI Pro
To me, this is one of the best free daws of 2026. MPC Beats comes straight from AKAI, the company behind the iconic hardware samplers that shaped hip-hop production. This DAW brings that classic pad-based workflow into a free software package.
What I like is how fast you can jump in and start making beats. The 16-pad grid layout feels natural if you’ve ever touched an MPC controller or even just watched beat-making videos. You’re not wrestling with menus or settings. You’re hitting pads and building grooves.
The DAW includes 2GB of sounds right out of the box. Drum kits, loops, one-shots, all ready to drag and drop. For someone just starting out, that removes the “where do I even find sounds?” problem that stops a lot of beginners cold.
What you get with MPC Beats:
- Pad-Based Beat Making Interface
MPC Beats centers everything around a 4×4 pad grid that lets you trigger samples, drums, and loops exactly like the hardware MPCs that producers have used for decades. I can load up a kit, tap out a pattern, and hear results in seconds.
The workflow keeps you focused on rhythm and groove instead of getting lost in technical settings. If you’re into hip-hop, lo-fi, trap, or any sample-heavy genre, this layout clicks immediately.
- Built-In Sounds and Instruments
The DAW ships with three virtual instruments (Bassline, Tubesynth, and Electric) plus around 80 effects from the AIR collection. That’s enough to shape your sound, add some synth layers, and mix your beats without buying anything else.
The 2GB sound library covers drums, loops, and samples across multiple genres. You can start producing the moment you install it, which is huge when you’re learning or just want to sketch ideas quickly.
- VST Plugin Support
Even though MPC Beats is free and focused on sampling, it still lets you load third-party VST and AU plugins. That means you can expand your sound library, add your favorite synths, or use effects you already own. I’ve even seen people load MPC Beats itself as a plugin inside another DAW when they want that MPC-style sequencing without switching software completely.
- Sample Editing and Chopping Tools
The sample editor gives you tools to chop loops, rearrange slices, and build new patterns from existing audio. If you love flipping samples or reworking loops into something fresh, this is where MPC Beats really shines. The process feels immediate and creative, not technical or buried in submenus.
One thing to know upfront: MPC Beats limits you to 2 audio tracks and 8 MIDI tracks. That’s tight if you’re planning full arrangements with vocals, live instruments, and complex layering. Some users also find the piano roll and arrangement view less smooth than other DAWs. But for beat sketching, loop-based work, and learning the fundamentals of sampling, MPC Beats gives you a lot without asking for a dollar.
2. Ardour

Image Credit: Ardour
Ardour is another great free DAW for Windows that’s completely open-source and still manages to deliver a professional-grade workflow. You’re getting a full DAW that runs on Windows, Mac, and Linux without spending a single dollar or hitting frustrating paywalls.
I like how Ardour doesn’t treat you like a beginner by locking features behind upgrades. You get unlimited tracks, buses, and routing options right from the start. The only thing holding you back is your computer’s power, not artificial restrictions programmed into the software.
The routing system in Ardour honestly feels like working with high-end studio gear. I can send audio anywhere I need it to go, set up complex signal chains, and manage multiple outputs without fighting the interface. It’s the kind of flexibility I’d expect from expensive commercial DAWs, not something I downloaded for free.
Features:
- No Limits on Tracks or Project Size
This is probably my favorite thing about Ardour. You won’t run into those annoying caps on how many tracks you can record or how many plugins you can load. If you’re working on a massive 60-track mix or just a simple four-piece band recording, Ardour handles it the same way.
Your hardware decides what’s possible, not the software license.
- Professional Routing and Mixing Tools
The mixer in Ardour is seriously impressive. I can route signals between tracks, create bus sends, set up side-chain compression, and even handle multichannel audio without breaking a sweat.
You get flexible panning, unlimited inserts and sends, plus the ability to connect external hardware or network audio sources. It’s modular in a way that makes complex mixing feel manageable instead of overwhelming.
- Full Audio and MIDI Editing with Video Support
Ardour gives you non-destructive editing with unlimited undo, which saves me when I’m experimenting with arrangements. You can layer regions, comp takes, edit MIDI, and even import video if you’re working on soundtrack projects.
The timeline locks to video frames, so syncing dialogue or scoring to picture actually works smoothly. Export options are robust too, with WAV, FLAC, MP3, stems, even CD mastering formats with cue sheets.
- Open Source Flexibility and Plugin Support Because
Ardour is open-source, you’re not stuck with what the developer decided you need. It supports VST, LV2, and AU plugins depending on your operating system, so you can use pretty much any effect or instrument you already own.
There’s also built-in Lua scripting if you want to automate tasks or customize workflows. I love that the community can contribute improvements and that updates happen transparently without surprise subscription fees.
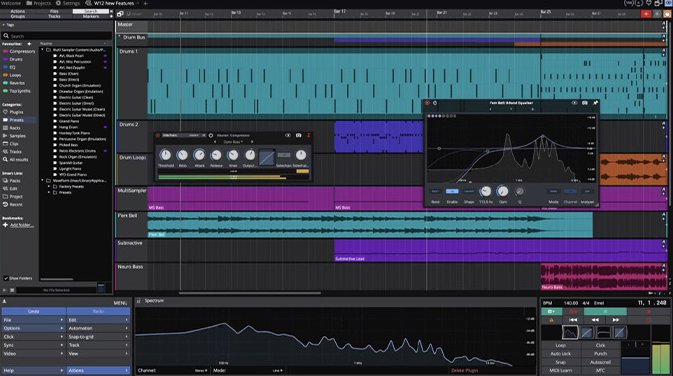
3. Tracktion Waveform Free

Image Source: PluginBoutique
Waveform Free by Tracktion is one of the best free DAWs out there because it doesn’t hold back the way most free DAWs do. When I first tried it, I expected the usual limitations, maybe a cap on tracks or some annoying export watermark. Instead, you get unlimited tracks, full plugin support, and no restrictions on how you save or bounce your music.
What really caught my attention is how clean and modern the interface feels. It doesn’t look or act like stripped-down software. You get a single-window workflow that keeps your mixer, tracks, and effects all in one view, which means less clicking around and more time actually making music.
The built-in tools surprised me too. You’re not stuck with just bare bones here. Waveform Free ships with solid instruments, samplers, and a full suite of mixing effects that cover most of what you need to start producing right away.
- Unlimited Tracks and No Export Limits
The biggest win with Waveform Free is that you can create as many tracks as your computer can handle. There’s no artificial limit forcing you to bounce or freeze tracks early.
I can layer vocals, stack synths, build complex arrangements, and export everything without hitting a wall. Most free DAWs cap you at eight or twelve tracks, which kills creativity fast. Here, the only limit is your hardware. That freedom alone makes Waveform Free worth downloading.
- Built-In Instruments and Effects
Right out of the box, you get a 4-oscillator synth, drum sampler, micro sampler, and a few other instruments that let you start writing music immediately. The effects rack is pretty complete too: compressor, gate, limiter, multi-band EQ, reverbs, delays, chorus, phaser, and distortion all included.
I’ve mixed entire tracks using just the stock plugins. They’re not the fanciest tools out there, but they work well and sound clean. If you want more, Waveform Free supports VST and VST3 plugins, so you can expand your setup whenever you’re ready.
- Modern Interface with Smart Workflow Tools
I really like how Waveform Free handles navigation. The Properties and Actions panel keeps everything organized in one place, so you’re not hunting through menus. The browser is smart too, you can tag samples, create favorites, and search quickly through your plugins and sounds.
It also has light and dark themes and a color editor if you want to customize how things look. The whole design feels more like a current, polished DAW than something you downloaded for free. It keeps me focused on the music instead of fighting with confusing menus or outdated layouts.
4. BandLab Cakewalk

Image Credit: DJMag
When Windows users talk about free DAWs that actually feel complete, Cakewalk usually comes up first.
What stands out to me is that this isn’t some stripped-down “lite” version. Cakewalk used to be a professional DAW called SONAR that cost hundreds of dollars. BandLab bought it and made it totally free for Windows users. That means you’re getting professional-grade mixing tools, unlimited tracks, and full VST support without paying a cent.
I won’t pretend it’s perfect. The interface can feel a bit old-school and crowded compared to newer DAWs. But if you’re willing to spend time learning it, you get access to recording and mixing capabilities that rival paid software.
It works great for full music production. You can record live instruments, program MIDI, mix everything down, and master your final track all in one place. Over 300 built-in instruments and effects come included, plus you can load any third-party plugins you want.
Main features:
- Unlimited Audio and MIDI Tracks
Most free DAWs limit how many tracks you can use. Cakewalk doesn’t. You can layer as many instruments, vocals, and effects as your computer can handle. This matters when you’re building complex arrangements with drums, bass, guitars, synths, and vocals all running at once. I’ve worked on projects with 50+ tracks and never hit a wall.
- Professional Mixing Console
The mixing tools in Cakewalk remind me of expensive DAWs like Pro Tools or Studio One. You get a full routing system with sends, returns, and bus channels. The built-in EQ, compression, and reverb are solid enough to mix an entire song without downloading extra plugins. It’s not the prettiest interface, but everything you need is there once you learn where to look.
- Full VST Plugin Support
Cakewalk works with VST2 and VST3 plugins, which means you can expand your sound library however you want. Whether you’re into free plugins or want to invest in premium instruments later, they’ll all work. This flexibility is huge because you’re not locked into only using what comes with the DAW. I’ve loaded everything from free synths to paid mixing plugins without any issues.
Access to BandLab’s Sound Library
Since BandLab owns Cakewalk, you get free access to their royalty-free sample library. Loops, drums, and one-shots are available directly inside the DAW. It’s helpful when you need quick inspiration or want to sketch out ideas fast. The sounds are decent quality and cover most genres from hip-hop to rock.
5. UAD LUNA

Image Credit: BedroomProducersBlog
LUNA is another free DAW for Windows built it to sound like a real recording studio, not just another grid for arranging MIDI clips.
What gets me excited about LUNA workstation is how free it became for everyone in 2025. You don’t need expensive UA hardware anymore. You can grab it on Windows or Mac and use it with any ASIO or Core Audio interface you already own.
The workflow reminds me of old-school tape machines and mixing consoles. There’s something about the way tracks respond that makes mixing feel physical, even though you’re clicking a mouse. If you’re tired of cold, digital-sounding mixes, LUNA might click for you in a way other free DAWs don’t.
What really surprised me in the latest updates is the AI stuff. I know “AI” gets thrown around a lot, but here it actually helps. LUNA can now listen to what you’re recording and automatically figure out if it’s a guitar, vocal, or drum track. It names and color-codes everything for you without asking.
Things to mention:
- AI-Powered Instrument Detection
When you start recording, LUNA analyzes the audio and figures out what instrument you’re tracking. It then automatically names your tracks, assigns color codes, and adds visual icons.
This might sound small, but when you’re deep in a session with 20+ tracks, having everything organized without lifting a finger keeps you focused on music instead of housekeeping. I’ve saved so much time not having to stop and label every single track manually.
- Smart Tempo Tools for Natural Recording
If you like recording without a click or working with live performances, you’ll love this. LUNA has Tempo Detection and Tempo Extraction built right in. You can record a guitar part that speeds up and slows down naturally, and LUNA maps the tempo changes for you.
Then when you add loops or MIDI later, everything syncs up perfectly. It’s honestly one of the most musician-friendly tempo tools I’ve used. You stop fighting the grid and just play.
- Analog Console & Tape Emulation Workflow
This is where LUNA stands apart from every other free DAW. You get built-in tape saturation through the Oxide Tape Extension and console-style summing that makes your mix feel warmer and more glued together.
Most DAWs sound clean and clinical, which is fine for some genres, but if you want that vintage studio vibe without buying expensive plugins, LUNA gives it to you for free. I use it on every mix bus now because it just sounds better.
Multi-Output Plugin Support
For a long time, LUNA didn’t handle multi-output instruments well, which was frustrating. But with the 2025 updates, you can now route multi-output VSTs like drum samplers to separate mixer channels.
That means you can process kicks, snares, and hi-hats individually instead of being stuck with a stereo mix. It’s a huge improvement if you work with detailed drum programming or layered instruments.
6. Pro Tools Intro

Image Credit: Avid
What makes Pro Tools Intro stand out is that you’re working inside the actual Pro Tools environment, just scaled down.
When I first tried Intro, I didn’t expect it to feel this close to the full version. Pro Tools Intro runs on the same core engine as the paid Pro Tools tiers, which means you’re learning the real workflow from day one. If you decide later to upgrade to Artist or Studio, your sessions open right up without weird conversion issues or reformatting.
One thing I really appreciate is unlimited third-party AAX plugin support. You’re not stuck in some locked plugin store or forced to buy extras just to get started. Any AAX plugin you download or buy works in Intro the same way it works in the full version.
Key features:
- Industry-Standard Workflow & Session Compatibility
The moment you open Intro, you’re inside the same interface used in professional studios around the world. That matters if you ever want to collaborate with other Pro Tools users or take a project to a bigger studio later.
Sessions you create in Intro can be opened in higher-tier versions, so nothing you build gets left behind. I’ve opened Intro sessions in Pro Tools Studio without any problems, as long as I stayed within the track limits or consolidated things first.
- Full Plugin Freedom & Decent Starter Bundle
Intro doesn’t lock you into a vendor marketplace. You can install and use any AAX plugin, whether it’s free or paid. That gives you room to grow your toolkit over time without switching DAWs.
The software also includes over 35 built-in plugins like EQ, compression, reverb, delay, and a channel strip. Plus, you get Xpand! 2, a virtual instrument with hundreds of sounds, from pianos to synth pads to arpeggios. It’s enough to start making full tracks right away.
- Professional Audio Quality & Interface Support
Even though it’s free, Intro supports up to 192 kHz sample rate and 32-bit floating point audio. That’s higher quality than most free DAWs offer. You can use pretty much any audio interface through ASIO or Core Audio, and record up to 4 inputs at once, which works great for vocals, guitar, or small band setups.
- Local Saving & No Cloud Requirements
Unlike older free versions, Intro lets you save sessions locally on your computer. You’re not forced into cloud-only projects or capped at a certain number of saves. That makes your work more flexible and keeps you in control of your files.
- Track Limits You Need to Plan Around
Intro caps you at 8 audio tracks, 8 instrument tracks, 8 MIDI tracks, 4 aux tracks, and 1 master fader. For small projects like demos, podcasts, or simple songs, that’s totally workable.
But if you want to layer lots of vocals, build complex arrangements, or work with large band recordings, you’ll hit those limits fast. I’ve had to bounce tracks to audio or plan carefully to stay under the caps. There’s also no video track support or surround mixing, so it’s not built for film or post-production work.
7. Audacity

Image Showing upcoming Audacity 4 interface redesign (soon). Image credit: Reddit
This one is actually one of the oldest and best free daws for Windows. Audacity gets recommended often, and honestly, I think that’s because it nails one specific job better than almost anything else at this price point.
If you need to record audio, clean it up, edit clips down to the tiniest detail, or fix problem recordings, Audacity does it well. It’s not trying to be a full production studio with MIDI and virtual synths. It’s an audio editor first, and that narrow focus makes it really good at what it does.
I’ve used Audacity for podcast cleanup, trimming samples, removing background noise from voice recordings, and editing exported stems before bouncing them back into another DAW. It handles those tasks without drama. The interface feels simple but effective once you learn where everything lives.
What makes Audacity stand out is how lightweight and accessible it is. You can run it on older Windows machines without worrying about crashes or CPU spikes. It’s also completely free and open-source, so there’s zero cost barrier if you just need solid audio editing tools.
Things to know:
- Waveform Editing & Audio Cleanup Tools
This is where Audacity really shines for me. You get tools like noise reduction, normalization, compression, EQ, pitch shift, tempo adjustment, and fade controls that work directly on your waveforms.
- Spectral View Feature
It lets you see a visual frequency map of your audio, which makes it way easier to spot problem areas like hums, clicks, or unwanted noise. When I need to surgically remove a cough from a voice recording or clean up a noisy guitar take, I open Audacity first.
- Multi-Format Support & Plugin Compatibility
Audacity reads and writes WAV, MP3, FLAC, AIFF, OGG, and more. That flexibility means you can bring in audio from almost anywhere and export it however you need.
- No MIDI or Virtual Instruments
This is the big trade-off. Audacity doesn’t support MIDI sequencing or virtual instruments at all. There’s no piano roll, no built-in synths, no drum machines.
It also supports VST, VST3, LV2, LADSPA, and Nyquist plugins. So if the built-in effects aren’t enough, you can load third-party tools to expand what Audacity can do. I’ve added custom EQs and compressors this way when working on specific cleanup tasks.
If you want to compose music with software instruments, Audacity won’t help you. But if your workflow involves recording real instruments, vocals, or editing audio files, the lack of MIDI isn’t a dealbreaker. Just know what you’re getting into before you download it.
8. Endlesss Studio (Semi DAW)

Image Credit: Endlesss
Endlesss Studio isn’t a traditional DAW, and in 2025, it’s not even fully operational anymore.
But I’m including it here because if you’re curious about loop-based creativity or collaborative music-making, it’s worth understanding what this tool tried to do. Endlesss Studio was designed around live jamming and loop creation rather than timeline editing. The entire concept centered on improvisation and building music with others in real-time over the internet.
The workflow felt more like a live performance tool than a production suite. You’d open a jam session, play something through your MIDI controller or mic, and commit it as a loop. Then you’d layer more parts on top. You could invite people from anywhere to join your session and add their own loops while you worked.
The platform officially shut down its servers in May 2024. That means the social features, cloud storage, and collaborative jamming tools no longer function. Without those, you lose the main reason Endlesss existed in the first place.
What you will get:
- Live Loop Recording & Layering
Endlesss gave you an 8-layer looper where you could record ideas on the spot and instantly turn them into loops. I could play a synth line, lock it in, then add drums, bass, and effects without stopping.
The retrospective recording meant I didn’t have to hit record before playing. It captured what I just played and let me decide if I wanted to keep it. That removed a lot of friction when ideas were flowing fast. The built-in sampler let me chop and twist loops after recording them, which kept things flexible even after I committed a part.
- Real-Time Collaboration
Before the shutdown, you could start a jam and invite other musicians to join from anywhere in the world. Everyone could add loops, tweak sounds, and build tracks together live.
It felt less like sending files back and forth and more like being in the same room jamming. There was built-in chat so you could talk while creating. For producers who wanted a social creative space instead of working alone, this was the whole point of Endlesss.
- Built-In Instruments & Effects
You didn’t need third-party plugins to get started. Endlesss came with drum kits, bass and synth presets, a sampler, and effects like reverb, delay, and distortion.
The sound library wasn’t huge, but it covered enough ground to build complete loops. You could also route external gear or microphones through it and sample them directly into your session. That made it useful for hybrid setups where you mixed hardware and software.
- DAW Plugin Integration
Endlesss Studio could run as a VST or AU inside other DAWs. That meant I could use it as a sketchpad inside FL Studio or Ableton, then drag finished loops out as audio stems. It worked better as an idea generator than a full production environment.
Once I had a loop I liked, I could pull it into my main DAW and keep building from there. The problem now is that without server support, even this workflow feels incomplete because you lose access to cloud-saved sessions and certain sync features.
9. LMMS

Image Credit: Integraudio
LMMS is another open-source free DAW for Windows users.
It focuses on electronic music production and beat-making without pretending to be something it’s not. If you’re into synthesizers, MIDI programming, or loop-based music, LMMS gives you a solid creative space right out of the box. It ships with built-in synths and a step sequencer that feels natural once you get the hang of it.
The workflow reminds me of classic pattern-based DAWs. You can sketch ideas quickly, stack loops, and arrange them into full tracks. I’ve used it on older laptops without any slowdown, which is a huge plus if your computer isn’t brand new.
Things to know:
- Completely Free and Cross-Platform
LMMS is a is open-source software that works on Windows, macOS, and Linux. You don’t pay anything, you don’t hit upgrade walls, and you don’t deal with trial limits. I love that you can install it on any machine and start making music immediately.
The GPL license means the community can improve it, share presets, and build resources around it. If you’re starting out or working on a tight budget, this removes every financial barrier to music production.
- Pattern-Based Sequencing Perfect for Electronic Music
The piano roll and step sequencer make programming beats and melodies feel intuitive. LMMS comes with built-in synthesizers including classic-style synths and even chip-sound emulators that give you that retro video game vibe.
I find the pattern workflow keeps me focused on creativity rather than getting lost in menus. If you’re producing EDM, hip-hop beats, or synth-heavy tracks, the layout supports that style naturally. You can import samples, sequence MIDI, and build arrangements without needing external instruments right away.
- Lightweight and Runs on Modest Hardware
LMMS doesn’t demand a powerful computer. I’ve run it smoothly on machines that would struggle with heavier DAWs. This makes it great for quick sketches, travel setups, or secondary computers.
You get acceptable mixing tools, effects chains, and automation without the resource drain. For smaller electronic productions or beat-making sessions, the performance stays reliable even when you’re layering multiple patterns and effects.
- Limited Audio Recording Capabilities
The biggest weakness is audio recording. LMMS doesn’t handle live recording well, which means you can’t easily track vocals or live instruments inside the program. If you need to record guitar, microphone, or any live input, you’ll need to use external software first and then import the files.
This breaks the workflow and adds extra steps. I recommend LMMS only if you’re working purely with MIDI and samples, not if you plan to record live audio as part of your process.
How To Choose the Right Free DAW for Windows
Picking a free DAW comes down to matching features with your workflow, making sure it runs smoothly on your computer, and finding an interface that doesn’t slow you down.
Key Features To Look For
I always check the track count limit first because some free DAWs cap how many audio or MIDI tracks you can use at once. If you’re layering vocals, drums, synths, and effects, hitting a track limit kills creativity fast.
Plugin support matters just as much. You want a DAW that handles VST2, VST3, and ideally AU plugins if you ever switch systems. Some free options like Traktion Waveform Free give you unlimited tracks and full plugin compatibility, which feels like using paid software.
Recording features are another big one. Look for MIDI editing tools like piano rolls, quantization, and velocity controls if you’re programming beats or melodies. For live recording, you need solid audio editing with punch-in recording, comping, and time-stretching.
Don’t forget about included sounds and effects. A good starter library of virtual instruments and mixing plugins saves you from hunting down third-party freebies right away. Cakewalk by BandLab includes professional-grade plugins that used to cost hundreds of dollars.
System Requirements and Compatibility
I learned this the hard way: checking system requirements before downloading saves hours of frustration. Most free DAWs need at least 4GB of RAM and a dual-core processor, but more demanding ones like Studio One Prime work better with 8GB or more.
Your Windows version matters too. Some DAWs only support Windows 10 and 11, while others still work on Windows 8. Always verify compatibility on the developer’s website before installing.
Storage space is easy to overlook. The DAW itself might only need 2-4GB, but your project files, plugin libraries, and audio samples can eat up 20GB or more quickly. I keep at least 50GB free on my system drive to avoid slowdowns.
Pay attention to CPU usage when running multiple plugins. Older computers struggle with heavy processing, so you might need a DAW with good performance optimization or the ability to freeze tracks and bounce effects to audio.
User Interface and Ease of Use
The interface either gets out of your way or constantly trips you up. I look for clear visual layouts where the mixer, transport controls, and main workspace are easy to find without digging through menus.
Drag-and-drop functionality speeds up everything. Being able to drop audio files directly onto the timeline, rearrange tracks with your mouse, and move plugins between channels makes producing feel natural instead of technical.
Some free DAWs like GarageBand prioritize simplicity with big buttons and guided workflows, while others like Ardour give you professional-level control with steeper learning curves. Pick based on your experience level.
Customizable workspaces help once you know what you’re doing. I like being able to resize windows, hide panels I don’t use, and save different layouts for recording versus mixing. It’s a small feature that makes long sessions way more comfortable.

Hello, I’m Viliam, I started this audio plugin focused blog to keep you updated on the latest trends, news and everything plugin related. I’ll put the most emphasis on the topics covering best VST, AU and AAX plugins. If you find some great plugin suggestions for us to include on our site, feel free to let me know, so I can take a look!
