If you’re cleaning up vocals, fixing podcast dialogue, or trying to get rid of that annoying hum on a guitar track, a solid noise reduction plugin is no longer optional. It’s part of the basic toolkit for anyone working with audio.
The good ones use smart processing to pull out background noise, hiss, hum, and other junk while keeping your main audio sounding clear and natural while bad ones leave your voice sounding like it’s coming from inside a tin can.
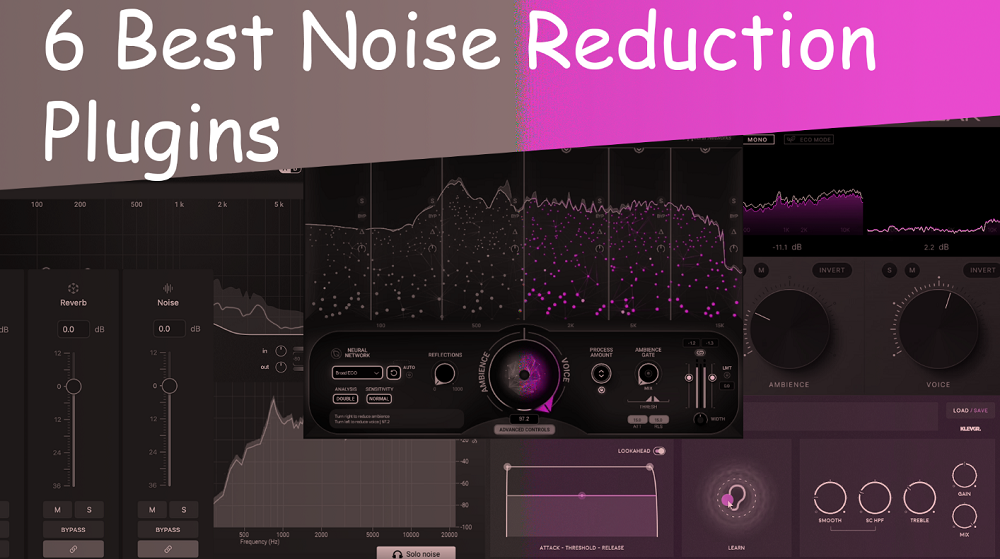
In this guide, I’ll walk you through both paid and free noise reduction plugins that actually do the job. You’ll find professional tools with AI-powered processing alongside free options that handle basic cleanup better than you’d expect. I’ve tried to cover different budgets and skill levels, and at the end I’ll break down how these plugins actually work behind the scenes so you can make a smarter choice for your workflow.
1. Klevgrand Brusfri
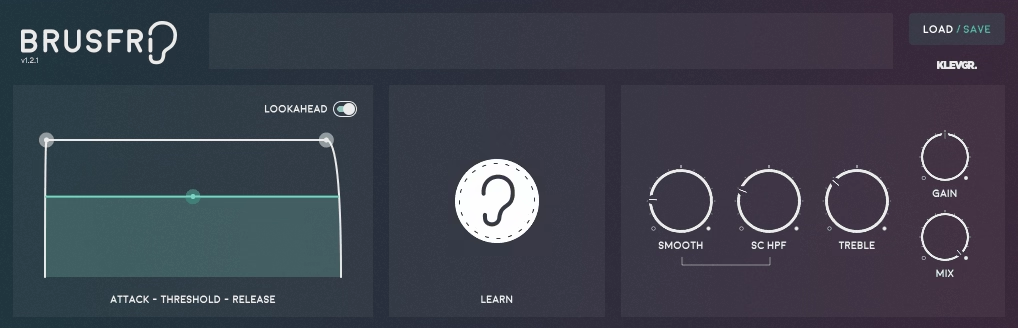
What sets Brusfri apart is the way it works under the hood. Most noise reducers use phase cancellation or spectral subtraction, which can leave your audio sounding thin or weird. This one takes a different route and uses targeted gating across different frequency bands, which means it mutes the noise without messing with the phase or tone of the actual recording.
The interface is clean and easy to figure out as you get controls for Threshold, Attack, Release, and a few others to dial in how much reduction you want. There’s also a Mix knob, so if full reduction sounds too harsh, you can blend the processed signal with the original.
- Learn-Based Noise Profiling
This is actually the heart of how the plugin works. You hold down the Learn button while playing a short section that has only the noise (no voice or music underneath). It captures that noise profile, and from then on it removes that exact noise from your recording which from my experience handles laptop fan hum, air conditioner buzz, and headphone bleed with just a few clicks.
- Minimal Artefacts And Transparent Sound
Because the processing uses gating instead of phase-based methods, your audio stays natural sounding. I can recommend it on vocals, acoustic guitar, and dialogue, and what’s great is that it doesn’t leave that hollow or metallic feel that some other noise reducers do, so as long as you don’t push the settings too hard, the cleanup is barely noticeable.
- Simple Controls That Work
Once you’ve captured the noise profile, you’ve got a small handful of settings to play with. Threshold sets how much noise gets removed, Attack and Release control how fast the gating reacts, and Edge adjusts the crossover between bands. There’s also a high-pass filter and an HF boost to bring brightness back after the cleanup. The whole plugin is built for quick results without burying you in options.
2. Waves Clarix LB
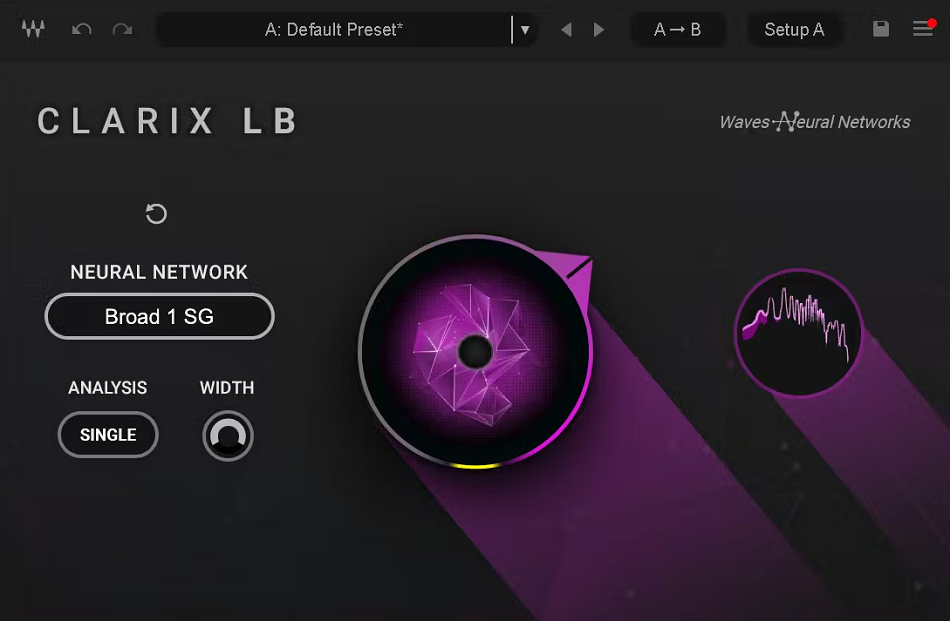
Waves Clarix LB is an AI-powered tool built specifically for voice and dialogue in live broadcast and live streaming, not your typical studio cleanup plugin.
While something like Clarity Vx is meant for cleaning up vocal stems after the recording, this one is engineered to clean up ambient noise in real time, while a broadcast is actually happening. It’s aimed at on-location news anchors, field reporters, live worship services, sports and live podcasts.
What makes it tick is the same Emmy Award-winning Waves Neural Networks engine that powers their flagship Clarity Vx plugins, so you’re getting that same artifact-free voice isolation Waves is known for, but built into a workflow for live engineers who can’t bounce, render, or tweak after the fact.
Because the network is trained specifically on voice, it isolates dialogue from ambient noise without the swirly, underwater artifacts older noise reduction approaches are known for, even when you’re pushing it hard during a live feed.
- Single-Knob Control
Even with all that tech under the hood, the actual interface is dead simple. You get a One main knob that lets you set the balance between voice and noise and that’s it. Broadcast engineers don’t have time to mess with thresholds, frequency masks, or noise profiles when the show is live. You set it, dial in the balance, and move on.
- SoundGrid Compatibility
The plugin is compatible with the Waves SoundGrid real-time processing platform, so it slots into pretty much any major mixing console through SuperRack SoundGrid, SuperRack LiveBox, or eMotion LV1 live mixer systems. For engineers already running a SoundGrid setup, it just plugs into the existing workflow without any weird routing tricks.
- 96 kHz With Stereo Width
When it comes to sample rate, you get up to 96 kHz, which lines up with the high quality requirements of professional broadcast and streaming. There’s also a ‘Double’ analysis mode plus width control for stereo sources, so when you’re processing stereo voice signals, you keep the stereo image intact instead of collapsing it down to mono. That’s maybe a small thing, but it matters a lot for ambient broadcast captures.
- Titan Server Requirement
I would like to mention this because it’s where things get serious. The plugin actually needs real processing power because of the neural networks running in real time, which means you’ll need a Waves Titan SoundGrid server to run it on most SoundGrid platforms. Waves recommends keeping at least 50% of Titan’s processing power free for it at all times.
Tested benchmarks include 30 mono instances at 48 kHz or 20 mono instances at 96 kHz on SuperRack SoundGrid with Titan, and 12 mono instances at 48 kHz or 8 at 96 kHz when running natively on SuperRack LiveBox. That said, scalability is solid, but to be honest, the upfront infrastructure cost is real.
3. Accentize dXRevive Pro
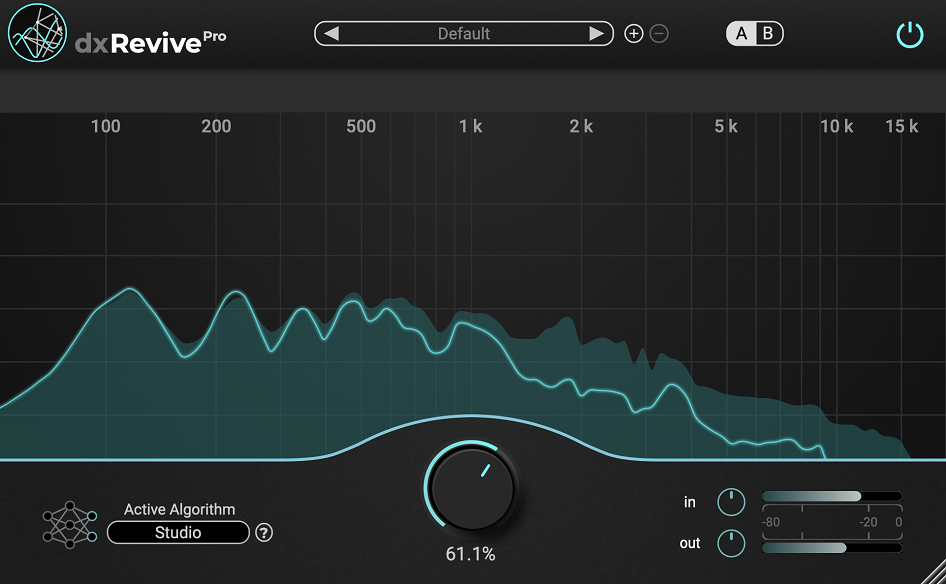
Missing frequencies and lost clarity are exactly where dXRevive Pro earns its keep. I’d say it’s less of a noise reducer and more of a dialogue rescue tool, and it does that job better than most plugins I’ve tried.
If you’ve ever recorded a podcast guest with a bad internet connection, or used a cheap USB mic for voiceover, you know how frustrating it is when EQ and compression just don’t fix the problem. The plugin goes further than basic noise removal.
The interface is simple, with only a few main controls, but it offers several processing algorithms and lets you split your audio into bands, so that way you can fix specific issues without changing the whole recording. To me, it strikes a nice balance between being easy to use and actually powerful.
- AI-Powered Speech Restoration
The plugin uses machine learning to analyze your dialogue and rebuild it from the ground up. Instead of just removing noise, it fills in the gaps where frequencies are missing because of bad recording conditions or compression. From what I’ve seen, this is what makes it different from the rest.
- Studio, Natural, And EQ Restore Algorithms
You get different processing modes for different needs. Studio mode is great when you want a polished, professional sound. Natural mode keeps more of the original character while still cleaning up the audio. Having that variety means you can pick the best option for each piece of material instead of forcing every recording through the same setting.
- Multiband Processing Control
With this feature you can split the audio into up to four frequency bands and process each one independently. Maybe your low end could be fine but the highs are full of hiss, or you’ve got reverb muddying up the mids, so targeting specific frequency ranges gives you way more control than a single-knob tool. It’s especially helpful when you’re working with different voices or recording environments in the same project.
4. Supertone Clear
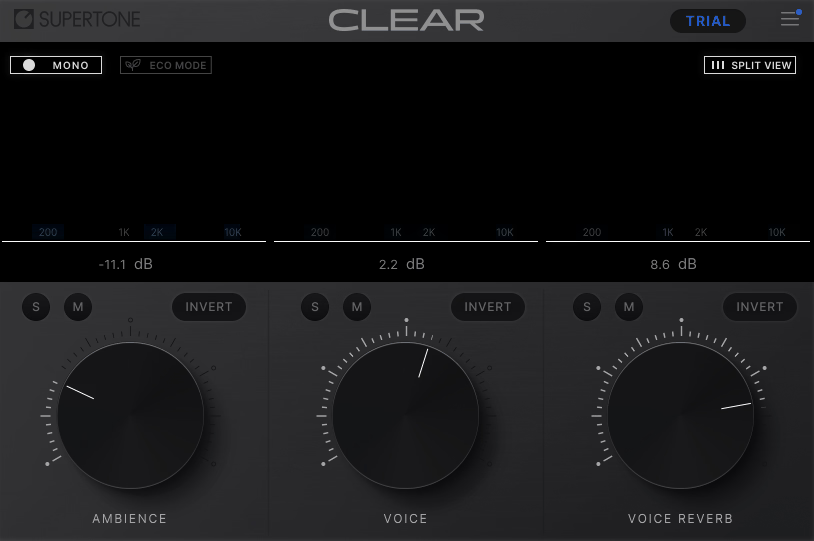
Pulling the voice out from noise and reverb (instead of just covering it up with a gate) is the whole idea behind Supertone Clear. That approach gives you a lot more control than older noise reduction tools.
It breaks your audio into three parts: voice, ambience, and reverb. You get three simple knobs to balance them, so you can clean up dialogue without making it sound flat or artificial.
Because the plugin works in real time, you can use it while recording vocals, streaming live, or editing, without having to bounce files. That’s huge for podcasters and streamers who need clean audio right away.
- AI-Powered Voice Separation
The processing uses neural networks to pick out and separate the voice from everything else in your recording. Background hum, room noise, and extra reverb get separated out without hurting the natural sound of your voice.
- De-Voice Mode For Ambience Extraction
Here’s a fun twist. You can flip the process and remove the voice entirely, leaving only the background ambience, so that comes in handy for sound design, atmosphere tracks, or pulling room tone for post-production work. I mean not something you’d use every day, but when you need it, it’s gold!
- Low CPU And Broad Compatibility
You get AU, VST3, VST, and AAX formats on both Windows and Mac, including native Apple Silicon support. There’s also a low-CPU mode, so you can run several instances without your computer choking.
5. Waves Clarity VX Pro
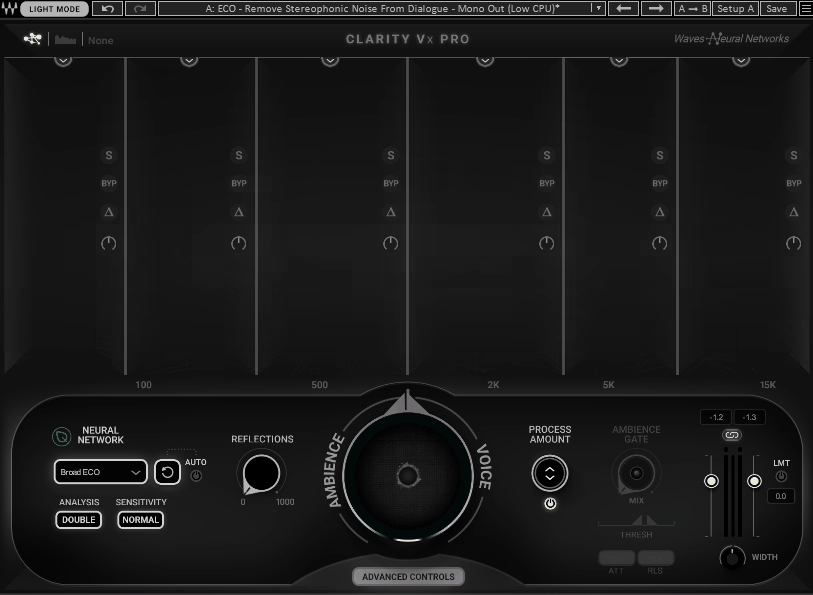
Waves Clarity VX Pro actually uses AI-trained neural networks to tell your voice apart from things like fans, street noise, room hum, and even background conversations.
What I like about it is that it isn’t a one-size-fits-all tool. If you just want a quick fix, the single knob works fine, but if you need more control, you can use the six-band multiband processing to adjust each frequency range on its own.
- AI-Powered Voice Separation
Built on Waves’ Neural Networks tech, the plugin’s been trained on millions of voice recordings, so it can pick your voice out from background noise the second you load it up. No tweaking, no setup. It just knows what’s voice and what’s not.
- Real-Time Processing Inside Your DAW
The plugin runs in real time while you’re editing and mixing, and your tracks keep playing right through it. It’s fully automatable too, so if the noise floor jumps mid-take, you can have it adapt automatically.
- Multiband Control And Ambience Tools
When I need more precise control, I switch to the multiband view. It lets you adjust six separate frequency bands, each with its own processing amount, bypass, solo, and gain. There’s also a “Reflections” control that adds a bit of natural room sound back in after the cleanup. Without it, voices can end up sounding too dry or flat.
- Multiple Neural Network Modes
You also get four different neural network modes for different situations. Broad 1 keeps both main and secondary voices, which is great for group recordings. Broad 1 HF does a better job of holding onto high frequencies, so airy voices and breath sounds stay clear. Broad 2 is more aggressive and works well for heavy noise or separating main voices from background chatter.
There’s a free trial you can take for a spin, and if you decide to buy it, you can support this site by going through the link.
6. Acon Digital Extract Dialogue
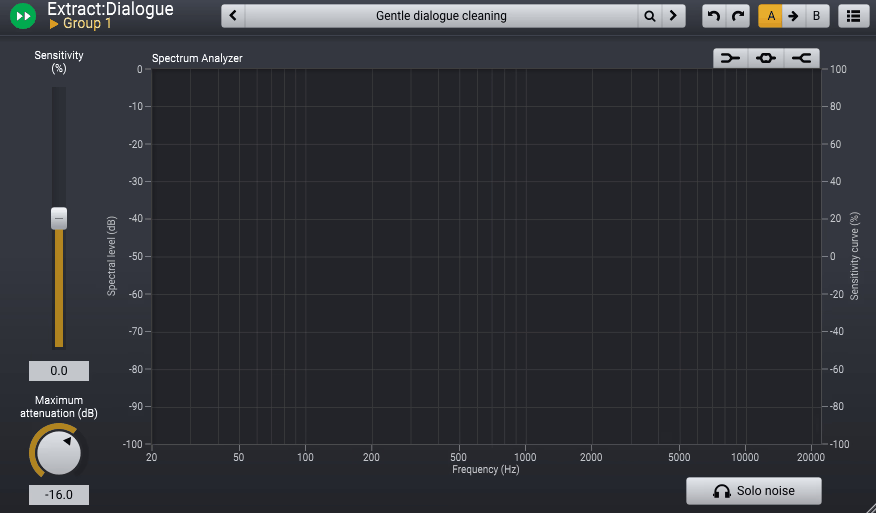
Speech buried under wind, traffic, hum, rustling, clicks, and pops is where Acon Digital Extract Dialogue (now version 2) does its best work.
The plugin was trained on thousands of voice and noise samples, and it can tell the difference between dialogue and unwanted noise, so you get cleaner results without manually hunting for problem frequencies or tweaking thresholds for hours.
Now, when it comes to interface, it’s really straightforward as there aren’t a lot of menus to dig through. Most of the time, you just load it, adjust the sensitivity if needed, and let it work in real time. I also like the solo noise feature, which lets you hear exactly what’s being pulled out. It helps you avoid accidentally cutting into parts of the voice you wanted to keep.
- Deep Learning Algorithm For Speech Isolation
The processing uses a neural network trained on real-world audio to automatically pick dialogue out from background noise, so you don’t have to teach it what noise sounds like or set up side chains. It basically listens and figures it out on its own. From my experience, that saves a ton of time when editing podcasts, interviews, or recordings with messy backgrounds.
- Frequency Band Sensitivity Controls
Even though most of the work is automatic, you can manually adjust three frequency bands: low shelf, mid peak, and high shelf. which lets you control how aggressive the noise reduction is in each part of the spectrum. If there’s a low-end rumble or high-frequency hiss that’s tough to nail down, you can focus on just that area without messing with the rest of the signal. It’s a good mix of automation and manual control.
- Maximum Attenuation Limiter
Sometimes you don’t want to remove all the background noise. For example, if you’re working on a documentary, you might want to keep some room tone for a natural feel. The adjustable attenuation control lets you decide how much noise to reduce, so you can keep the ambience without making the dialogue sound too processed. I’d recommend this if you want your audio clean but still natural.
- Solo Noise Monitoring And Spectrum Analyzer
Being able to solo what’s being removed is huge for quality control because you can listen to exactly what’s being taken out and make sure it’s not grabbing any voice content by mistake. In addition, built-in spectrum analyzer shows both the input signal and the noise being removed, giving you a visual reference so you’re not just guessing.
Free Plugins
1. Chaos Audio Eclipse
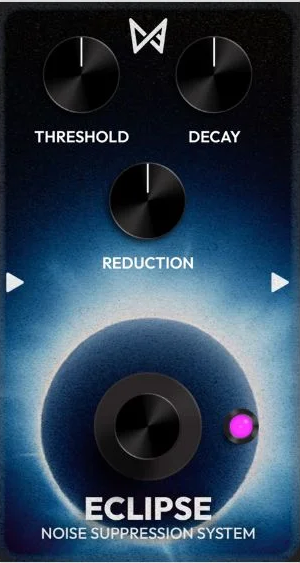
Eclipse keeps the workflow dead simple while still delivering results most paid tools would be happy to claim. Here, you get three simple controls, and that’s it. No intimidating menus, no complex routing, just clean noise suppression that works. When you’re tracking guitars late at night or cleaning up a vocal take with annoying room hum, it handles the job without drama.
The plugin is compatible with macOS and Windows in AU, VST3, and AAX formats. It works well on vocals, DI guitar tracks, synth pads, and podcast recordings. As long as the noise is steady (hiss, hum, or computer fan buzz), you can knock it down without much fuss.
- Threshold, Decay, And Reduction Controls
Threshold sets when noise reduction kicks in while decay controls how fast the suppression fades after the signal goes above the threshold, so your audio stays smooth and natural. Reduction sets how much noise gets cut when the signal drops below the threshold, so at maximum, it acts like a full gate, silencing everything below the threshold. For a more natural sound, I’d stick with moderate reduction.
- Lightweight And CPU-Friendly
The plugin is light on resources, so it works well on laptops or in sessions packed with plugins, so you won’t notice it eating into your CPU even if you’ve got a bunch of instances running.
- Transparent Noise Suppression For Multiple Sources
It works on a range of sources, including vocals and guitar DIs, and is especially good at reducing constant noise like electrical hum or ambient room tone.
2. Bertom Denoiser
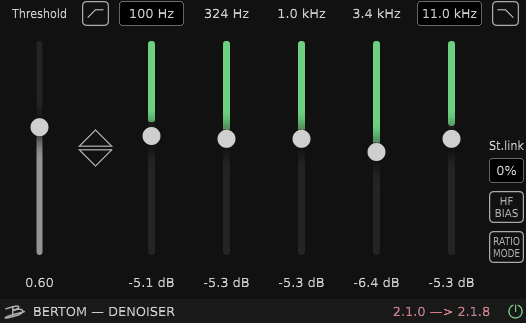
There are two versions of this one from Bertom Audio: Denoiser Classic (free) and Denoiser Pro (paid). The Classic version covers all the basics for noise cleanup at no cost. It works on Windows, Mac, and even Linux, which is unusual for free plugins.
It uses a time-domain method instead of complex FFT processing, so your audio sounds more natural. You also don’t need to capture a noise profile like you do with older plugins. Just load it, tweak a few knobs, and your audio is clean in seconds.
I use Bertom Denoiser a lot for cleaning up guitar DI tracks, vocals with room noise, and synths that picked up hum from my interface. It’s now one of the first noise removal VSTs I install on any new system.
- Zero-Latency Processing
This is great if you’re recording live or working in real time. The plugin adds no latency, so you can monitor while recording with no delay. I’ve used it for live streams and podcasts where any delay would have been a problem. Most noise reduction plugins make you render offline or deal with lag. This one doesn’t.
- 5-Band EQ With Custom Noise Shaping
There’s a 5-band EQ built in, so you can choose which frequencies get noise reduction. That gives you way more control than basic threshold-based denoisers. If most of your noise is in the high end, you can target it without touching the low mids where your vocal tone lives. From my experience, this is especially helpful on acoustic guitar tracks, where finger noise and string buzz sit in specific frequency ranges.
- Simple Interface For Quick Results
The interface is clean and easy to use. There aren’t too many controls or confusing options, just a threshold slider, a reduction amount, and the EQ bands. When I’m working fast and need to clean up audio quickly, the last thing I want is to learn a complicated interface. This one lets you stay focused on the music.
3. ToneLib Noise Reducer
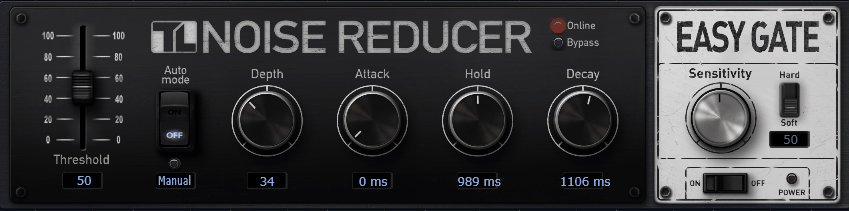
Finding a free noise reduction plugin that actually works can feel impossible, but ToneLib Noise Reducer proved me wrong. It combines two separate units in one rack, which gives it more flexibility than most free options.
You get the Studio Rack Unit for broader noise reduction, and the EasyGate Unit, modeled after guitar pedals. Both tackle unwanted noise, but in different ways, depending on what you’re cleaning up.
I mostly stick with automatic mode, where you just set the threshold slider and let the plugin handle the rest by listening to your input and pulling down noise when things get quiet, which alone saves you a ton of time cleaning up guitar tracks and demos.
- Two-Unit Noise Reduction System
For a free plugin, getting both a Studio Rack Unit and an EasyGate Unit in one rack is pretty generous. EasyGate is great for guitar hum or amp noise because it works like a pedal gate. The Rack Unit is better for cleaning up different instruments, so having both in one place means you can solve most basic noise issues without reaching for anything else.
- Automatic Mode With Simple Controls
The automatic threshold control listens to your signal and decides when to reduce noise. You don’t have to mess with complex editing or detailed parameters. Just set the threshold, tweak the sensitivity if needed, and you’re done.
- ADSR Envelope Shaping
It let you decide how the noise reduction starts and stops. You can tweak the attack and release times to keep the sound from feeling choppy or unnatural which helps preserve the natural feel of instruments and room ambience while still cutting noise between phrases.
- Cross-Platform Support And Low CPU Usage
You get the plugin as a 64-bit VST, VST3, and AU for Windows, Mac, and Linux. It also works as a standalone app, and it uses very little CPU power.
How Noise Reduction Plugins Actually Work
Noise reduction plugins analyze your audio to find and remove unwanted sounds like hum, hiss, or background noise. They use digital signal processing to separate clean audio from the noise, though each plugin has its own approach.
Common Techniques Used In Noise Reduction
Most of the noise reduction plugins I’ve used fall into one of a few main approaches.
Spectral noise reduction is the most common method. It learns what your noise sounds like from a sample, then removes those frequencies from your recording. You usually capture a noise profile from a quiet section, and the plugin uses that as its reference.
Broadband noise reduction handles steady background sounds across all frequencies. It works well for air conditioning hum, computer fan noise, or a steady hiss from a preamp. The processing covers the whole spectrum instead of focusing on specific bands.
In addition, AI-powered noise reduction is getting more common all the time. These plugins use machine learning to tell the difference between voices, instruments, and noise. Since they’re trained on huge libraries of recordings, they can usually figure out what to keep and what to remove without needing a noise profile.
Digital Signal Processing Basics
When you use a noise reduction plugin, it splits your audio into small chunks to analyze it. The plugin uses Fast Fourier Transform (FFT) to convert your audio from a time-based waveform into a frequency spectrum. That’s how it figures out which frequencies belong to your actual sound and which are just noise.
You’ll usually run into controls like threshold and reduction amount. Threshold tells the plugin how loud something has to be before it’s treated as signal instead of noise. The reduction amount controls how aggressively the plugin cuts the sounds it identifies as unwanted.
Attack and release settings control how fast the plugin reacts to changes. Faster settings catch noise quickly but can sound unnatural. Slower settings are smoother but might let some noise slip through during quiet parts.
Avoiding Audio Artifacts
The biggest challenge with noise reduction is making the audio sound natural while still removing enough noise. It’s because Iif you over-process it, you’ll end up with artifacts that sound worse than the original noise, like watery or metallic tones. I would always start with gentle settings and only push the reduction up until the noise is less noticeable, not totally gone.
It’s also important to preserve transients when you’re working with drums, guitar picks, or vocal consonants. Heavy noise reduction can dull those sharp sounds. Most good plugins let you protect transients or high frequencies from too much processing.
Lastly, I’d recommend using real-time monitoring while you adjust settings. Many plugins let you listen to only what’s being removed, which makes it easy to tell if you’re cutting into the actual signal instead of just the noise.
Bottom line: good noise reduction is about taste as much as tech. Start gentle, keep your settings honest, and your recordings will sound clean without sounding processed.
Hello, I’m Viliam, I started this audio plugin focused blog to keep you updated on the latest trends, news and everything plugin related. I’ll put the most emphasis on the topics covering best VST, AU and AAX plugins. If you find some great plugin suggestions for us to include on our site, feel free to let me know, so I can take a look!