Anyone who has edited dialogue for a film or TV show knows exactly what it feels like to stare at a session full of boom and lav tracks that are fighting each other.
The comb filtering that happens when two mics are at different distances from the same source creates a thinness and a phasiness in the combined sound that’s immediately recognizable, and fixing it manually the old-fashioned way, by nudging clips sample by sample and listening for the improvement, is one of the most time-consuming and tedious tasks in all of post-production audio.
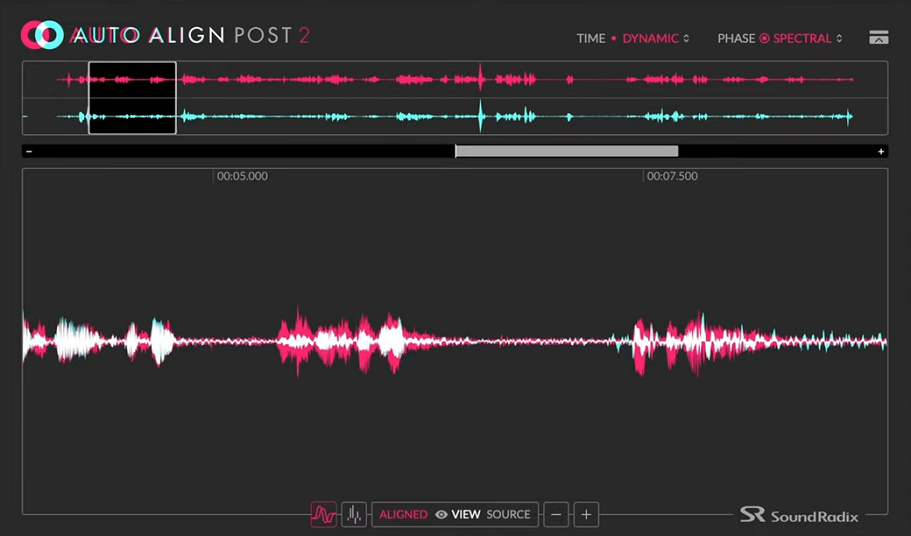
Auto-Align Post 2 from Sound Radix was built to solve exactly that problem, and it does so in a way that I think fundamentally changes how practical it is to use all your location microphones simultaneously rather than just the best one.
The original Auto-Align Post launched in 2018 and quickly became a go-to tool for dialogue editors on major productions, credited on everything from Bridgerton to The Greatest Showman to Cobra Kai. Version 2 takes the core capability further with a new Spectral Phase Correction module, a refined detection algorithm, ARA2 integration for compatible DAWs, a 28-band spectral correlation meter, and expanded platform support including Adobe Premiere Pro and DaVinci Resolve Studio.
The improvements aren’t cosmetic upgrades to a working product. They address a specific gap that version 1 left open, which is the phase problems introduced not just by physical distance between microphones but by the electronic filters that location mixers apply to the boom mic on set.
I’d say Auto-Align Post 2 is genuinely worth it for anyone doing regular dialogue editing work on narrative productions, and it becomes more worth it the more complex your mic setups are. What used to take days of manual nudging now takes a few clicks, and the quality of the alignment consistently exceeds what most editors can achieve manually even with unlimited time.
Dynamic Mode
The central challenge in location dialogue recording is that actors move, and when they move, the distance between them and the boom microphone changes continuously throughout a take. That means the phase relationship between the boom and the lav isn’t a fixed offset you can correct once and forget. It’s a constantly shifting variable that traditional time-nudging tools simply cannot address because they can only apply a static correction.
This is where the Dynamic mode makes a fundamental difference. Rather than analyzing the relationship between microphones at the start of a clip and applying a fixed correction, the plugin continuously tracks the phase and timing relationship as the take progresses and applies real-time corrections that follow the movement.
The analysis works at the speech signal level, using the voice itself as the reference point to detect and compensate for shifting arrival-time differences between microphones as the source moves through the space.
The correction range extends to plus or minus 100 milliseconds, which corresponds to microphone distances of up to approximately 112 feet or 34 meters. I found that for virtually any practical location recording scenario, that range covers everything you’re likely to encounter. Even in large interior spaces or outdoor scenes with significant boom travel, the plugin handles the alignment without hitting its ceiling.
Static mode is also available for situations where the microphones aren’t moving, such as foley recording setups, music recording with multiple fixed mics, or ADR sessions where you want to align a newly recorded line to the existing production dialogue. The workflow in static mode is faster since there’s no continuous tracking involved, just a single analysis pass followed by a fixed correction.
The Spectral Phase Correction Module
This is the addition in version 2 that I think matters most for the real-world quality of the results, and it addresses a problem that wasn’t obvious until you understood why some aligned tracks still sounded oddly thin even after the timing correction was applied.
Here’s the issue: location sound mixers routinely engage a high-pass filter on the boom microphone to cut low-frequency rumble from traffic, HVAC, footsteps, and other environmental noise. That’s sensible practice on set and makes the boom track much more usable.
But electronic high-pass filters introduce a phase shift to the signal, meaning that even when the boom and lav tracks are perfectly time-aligned by the core algorithm, the frequency-dependent phase offset introduced by that filter causes low-end cancellation when the tracks are combined. The result is a thin, body-less sound that doesn’t match the fullness of either mic recorded alone.
The Spectral Phase Correction module detects these frequency-dependent phase shifts and corrects them dynamically alongside the timing correction, restoring the low-end body and weight to the combined signal. I must say the difference this makes on boom-plus-lav combinations is substantial and immediately audible.
Dialogue that would have sounded thin and hollow after mixing now has the natural fullness that the microphones actually captured on set.
The 28-band spectral correlation meter gives you a visual window into what the plugin is doing across the frequency spectrum, showing phase coherence band by band so you can see exactly where alignment is strong and where the spectral correction is working hardest.
DAW Integration & Workflow
The platform integration story in version 2 is meaningfully better than the original, and it’s worth laying out exactly what you get across different workflows:
- Pro Tools (AAX AudioSuite): the primary post-production workflow, processing clips offline with full access to all features including the spectral correlation meter
- ARA2 VST3: compatible with Nuendo, Studio One, and other ARA2-supporting DAWs, enabling track-oriented processing directly in the DAW timeline without the clip-bouncing workflow that AudioSuite requires
- Adobe Premiere Pro: a dedicated extension that lets you run alignment directly within the Premiere interface without a DAW roundtrip, which is genuinely useful for picture editors doing their own dialogue prep
- DaVinci Resolve Studio: native support added in version 2.3, expanding the plugin’s reach into one of the most widely used post-production platforms
The one-click re-align workflow is as straightforward as it sounds. You set up your reference track (typically the lav, which has consistent positioning relative to the source), load the plugin on the tracks you want to align to it, and let the algorithm run.
The analysis completes quickly, and the results are applied automatically. There’s no manual parameter adjustment required to get a solid result, though the interface gives you access to settings if you need to fine-tune specific situations.
There are no traditional presets in the conventional sense here since the plugin’s analysis-based approach generates corrections specific to each piece of audio rather than from stored parameter states. The intelligence is in the algorithm rather than in user-defined configurations, which is exactly the right design choice for a tool like this.
Authorization requires an iLok account, with the option to license to your machine, the cloud, or a physical iLok dongle depending on your preference and workflow requirements.
Formats: AAX Native (AudioSuite), VST, VST3, AU, ARA2
Works with: macOS (Apple Silicon and Intel), Windows 7-11 (64-bit)
Price: $249
Check here: Sound Radix Auto-Align Post 2
Hello, I’m Viliam, I started this audio plugin focused blog to keep you updated on the latest trends, news and everything plugin related. I’ll put the most emphasis on the topics covering best VST, AU and AAX plugins. If you find some great plugin suggestions for us to include on our site, feel free to let me know, so I can take a look!